Showing posts with label art instructor. Show all posts

Sunday, May 24, 2015

30 Day Drawing Challenge Day 23- Linking Shapes with Shadows

30 Day Drawing Challenge Day 23- Linking Shapes with Shadows

Linkage is a design fundamental that describes the process of bringing unity to a piece of art by building connections.  Connections bring harmony and balance and all kinds of good design qualities to your work.  These connections can be made in many ways, but actual physical linking of shapes isn't always possible or may not make sense in your composition.  This is where shadows can play a very convenient role!

Designing better shapes is something we should all be thinking about.  Linking shapes is a really great way to achieve this.  For example, it's often a good idea when possible to take a series of repetitive small shapes and bring them together with connecting shapes.  This can create larger and more interesting shapes, or bring variation to what would otherwise be simple repetition. Again, this is a role that shadows were born to play!

Shadows can be anything from short and stubby to long and lean.  They can go in any direction.   They can GROW if needed to fill gaps.  They can also have color!

(We explored Color and Shadows in Day 21 of our 30 Day drawing challenge- Here's the link in case you missed it: 30 Day Drawing Challenge Day 21: Shadows/Color )

For all these reasons shadows are the perfect means for designing better shapes and creating linkage within your work.


An example of how you can GROW shadows to connect otherwise disconnected shapes ©Rebecca Zdybel 

Today's Challenge: 


Step 1: Draw 3-5 disconnected shapes using a contour drawing and ink.  I love clothespins as a subject, but you can pick anything (toothbrushes, brushes, pencils, crayons...etc.)

Hint: Leave gaps here and there in the contours of your objects to allow for color to visually flow in and out of the shapes and allow for a sense of bounced color from shadow to object. 

Step 2: Use shadows to connect your shapes and form a unified drawing.  Watercolor, watercolor pencils, or watercolor crayons would be a great to use in order to create colored shadows, but colored pencils or markers could also work well. 

Note that my shadows are not realistic, but they serve to connect my shapes together and create linkage.  They also provide a cool complementary color to the warm oranges of the clothespins.  

Step 3: Send a photo of your final result to me:   rebecca@artmyrtlebeach.com

Have fun with this drawing and file the idea away for future compositions when you sketch!  As we learn to draw, these little tricks of the trade can make our work so much better, and they are not that hard.  You just need to spend a little time digesting them. =)

Here are some drawings from the sketchbooks of more fellow Drawing Challengers:  

These all illustrate a very great danger in going down the Zentangle path...IT'S ADDICTIVE and very meditative...and BEAUTIFUL when done like these drawings demonstrate. Wow!  If you missed that lesson, it's available following this link. If you go there beware of the risk of instant addiction! 30 Day Drawing Challenge Day 20- Zentangle


I'm already looking ahead to later this week.  I will be breaking out my Tombow marker in burnt sienna color -947 for a sketch or two during the final couple of weeks of this challenge.  If you would like to get one, it's around $5-6. Here is a link:  Tombow 947 Marker- Amazon

Rebecca Zdybel
Artist, Instructor, Art-Travel Instructor
Art Lessons: Drawing, Watercolor, Acrylic, Collage, Mixed Media
Myrtle Beach, SC
rebecca@artmyrtlebeach.com

Spread Light, Share Love, DO Art!

Feel free to share any of this blog post on your own blog or website, but I ask that you you include:
Rebecca Zdybel is an artist and instructor in Myrtle Beach, SC.  Follow her and see her work at http://www.artmyrtlebeach.com/


Join me on Google+ Rebecca Zdybel Google+ 

Wednesday, May 13, 2015

30 Day Drawing Challenge Day 13- Find a Favorite Font


30 Day Drawing Challenge Day 13- Find a Favorite Font

You can't do sketches enough. Sketch everything and keep your curiosity fresh. 
John Singer Sargent

I love letters!  I think they are an overlooked art in today's era of computers and texting.  It's almost criminal to think that kids are not being taught how to write cursive and develop their ability to write with style.  Beautiful lettering can improve a simple drawing and give it content and meaning.  Greeting card manufacturers make their millions based on this simple idea...take a thought and put it together with a picture and people will want it. 

When I look at people's sketches and art journals, often the sketch is good, but poorly executed lettering can take away from the drawing.  This doesn't have to happen. Until we look at lettering as art, we may miss the opportunity to write with artistic style. Today I'm going to help you do some thinking and some playing around with letters. =)

Based on this idea, I want you to take on the challenge of looking for a personally appealing font. Look for one you could adopt as your favorite.  I was amused to see that the font above is actually a continuous line font.  I thought it might be fun to share, since most of you tried to do a continuous line drawing on Day 10 (In case you missed it, here's the link:  Day 10 of my 30 Day Drawing Challenge- Continuous Line ).  

If you want to keep an art journal, this little exercise may be something to do more than once...after all you may want to mix up your lettering every once in a while. 

There are so many fonts out there...if you Google "fonts" you'll find an abundance of them.  If you don't feel like going to that trouble, here are a few you can try to practice.  You get to choose!


Materials you might use for this challenge: 
  • pencil, pens, markers, colored pencils, elegant writer marker, crayons, watercolor...use your imagination!
  • paper

Step 1- Pick out a font and draw the letters.  Think of each one as a drawing.  If the letter is enclosed in a box (as the one above) you can use the negative shape around the letter to help you form the shape correctly.  
Step 2- Embellish your alphabet with color!  If you use the elegant writer marker, then be aware it is not permanent and will bleed when water touches it, forming green and pink coloration.  If you dab it once it's wet, it will become more pink.  Test the Elegant writer with water on a test sheet prior to using on your drawing. It's really fun, but takes some practice.  
Step 3- When finished, take a photo and send it to me.  I would love to see the fonts you come up with!

Hint:  Keep an area on your paper dry if you want it to remain white when using watercolor or water-soluble markers/pencils. The pigment from watercolor or any other water-soluble mark makers will only travel where the water takes it.  Dry paper acts as a dam and prevents the color from moving there.


I'll show you mine if you show me yours! ;-)

I saw this font at Hobby Lobby in wooden letters, and liked it so much I took photos of them on the shelf.  People must have thought I was crazy, but I still love them and here they are all on one page.  I used an elegant writer to draw the contour of the letter and then took a wet brush and wet the OUTSIDE of the letters to make them pop. After it dried, I added more ink and reinforced shadows, and then took a wet brush and smeared them again.  Hint: when using the Elegant writer, have a kleenex in your hand at all times for lifting...the ink can get a bit crazy, but it's worth the effort. 

PS- for tomorrow, we will be using our elegant writer markers.  If you don't have one, you can substitute watercolor pencils or other water soluble markers (but they won't be as fun )

Keep up the good work...we are almost half way through our 30 days of Drawing!  I'll be back tomorrow with another challenge. If you're enjoying this challenge, share it with your friends =)

Rebecca Zdybel
Artist, Instructor, Art-Travel Instructor
Art Lessons in all media
Myrtle Beach, SC
rebecca@artmyrtlebeach.com

Spread Light, Share Love, DO Art!

Feel free to share any of this blog post on your own blog or website, but I ask that you you include:
Rebecca Zdybel is an artist and instructor in Myrtle Beach, SC.  Follow her and see her work at http://www.artmyrtlebeach.com/


Join me on Google+ Rebecca Zdybel Google+ 

Friday, April 10, 2015

How to Save a Failed Painting- "Take YOUR Painting From the Boneyard to Best in Show"


There is hope for the hopeless!  

Maybe you have a stack of dead soldiers in your army of past paintings. "Never throw away an old painting".  I've heard it often, maybe you have too.  It's good advice.  Today I share the technique used to breathe new life into a once-dead painting.

Take YOUR painting from the Boneyard to Best in Show =)

Whether you would call it reincarnation, evolution, or resurrection, this Easter weekend I celebrated more than one miracle.  Two of my paintings won awards in the Spring Seacoast Artist Guild Show on Saturday night.  It felt like a miracle, because I knew the secret history of the winning painting.  I knew that it had once been pronounced DOA (Dead on Arrival), and yet here it was sporting a big ribbon and "SOLD" on the tag.  Talk about transformation!  I thought it would make a lesson worth teaching and a story worth telling to both my students and you...
"Out of the Shadows"- mixed media watercolor on Paper
"Best In Show 2015" Spring Seacoast Artist Guild Show
 Collection of Glen and Martha Sledge

If you're like me, you have stacks of paintings.  There's the stack of paintings which are complete.  If I love the painting, it gets put in the pile headed for the frame shop.  Since this is an expensive pile, it tends to be my smallest pile.  

If I'm not sure whether a painting is complete or not, it goes in the "To Do" stack of paintings (often my biggest stack).  

If a painting is lost and I'm pretty sure it's beyond redemption, then it goes into the pile I don't show anyone.  It's squirreled away in a box in the closet. 
I call it "the Boneyard".  

How to Save a Failed Painting- Turn Your Failed Painting into a Prize Winner!

Step 1:
Go to your boneyard or your "I don't know what to do with it" pile and find a painting that you'd like to reinvent.  I would suggest something with good color harmony.

  • You could also look for the following:  exciting line quality, nice value patterns, interesting shapes, patterns you enjoy, or maybe a cool texture.  Any of these might be used as the foundation for a new painting.  

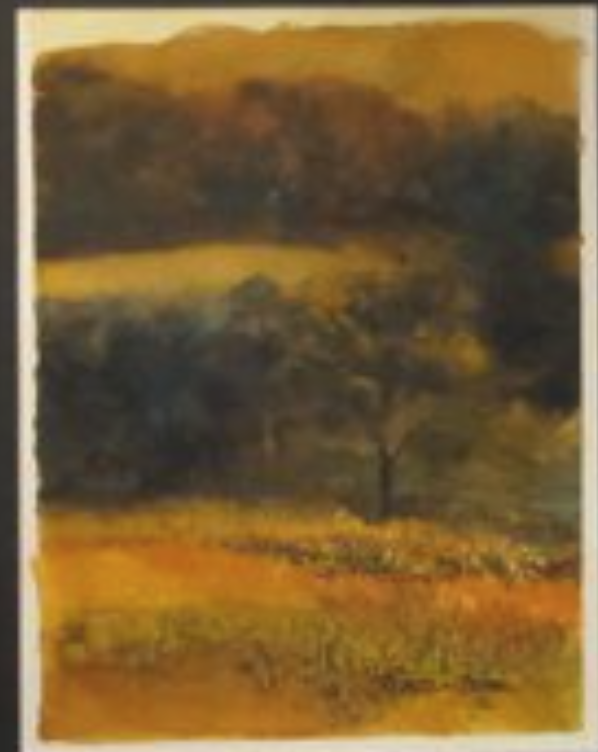
Here is a painting very similar to the failed painting used as the foundation for "Out of the Shadows" shown above.

As you can see, it was a dominantly warm painting, with some horizontal movement. It failed to pass muster, so there it sat.  DOA.  The mood created  by the harmonious color was promising, so it became the basis of this exercise.


Step 2:  Ask Yourself, "What If...?"

I liked the color harmony and asked "What If...?"  When I ask this question, magic can happen.

This time the question was, "What if I make a collage paper that organizes my painting into a good design?"  Good design is fundamental to successful paintings, and so I chose a design form I tend to like:  Strong Verticals.  Here are some other examples of images with strong verticals:
Strong Verticals add a sense of organization to even a minimalist arrangement. 
What Lies Beyond- Rebecca Zdybel Acrylic on Canvas


Painting with vertical composition by Bob Burridge- Love his work!

Since my painting was a horizontal, I turned it on it's side to create a vertical orientation.  (yes, that's allowed!)  If you'd like to take your old painting and do something similar, decide on the best orientation for your piece.

Step 3:
Take some collage paper pieces, and lay them down to create a vertical organization.  Or collage over your painting with collage pieces that contain vertical elements.

Adhere the collage to your failed painting in various vertical shapes using either thinned Yes! paste or acrylic matte medium.  Let the underpainting show through in various ways.  Or, in as in my case, you could adhere translucent collage paper over the entire painting.  If you wish, you can then reveal the underpainting in various ways.

4. Always Strive for "Harmony, with Variety"

 I use Harmony an overriding principle.  Be ready to sacrifice everything for the sake of Harmony.  If you have harmony and unity, I guarantee your painting will hold together.  Set a goal of repetition with exaggeration and variety...in this case, we are going to exaggerate color temperature and organize shapes to create vertical movement.  This is how exaggeration helps a painting.  By emphasizing a design plan, we will likely create a sense of dominance, and that dominance will bring harmony to the painting.

5.  After adhering your collage- Paint on top of the collage, or paint negatively around the collage to accentuate or embellish the painting.  Create movement and trails for the eye to follow.  Do this using color, value, shapes or lines.  Our eyes look for stepping stones to follow and as artists we can make this happen for our viewers.  Remember, as the artist, YOU are in charge of where the eye will go.

Remember this design fundamental:  Repetition with Variety

Be careful not to do the same thing over and over in the same way.  Every time to you repeat yourself, do it a bit differently.  Think of it this way.  If you listened to a note on the piano and the same note was played in the same octave at the same volume with the same rhythm, it wouldn't take too many of those notes before they made you crazy.  Vary your notes.

Not a musician?  As an artist your notes are your shapes, colors, lines...whatever you create.  Vary their size, their direction, their color, their edge quality, their texture, their pattern, their value.  This variation, will keep your painting from being boring.  Be anything but dull!  Push your paintings, exaggerate, risk going too far.  Especially in watercolor, I think the tendency is to be safe, and sometimes that results in dull work.

6. Create a Focal Area or center of interest: To establish an area of interest or a focal area and entertain the viewer with a little "surprise".  For example: in a predominantly warm painting with light colors, it might be nice to have a cool dark in an area of interest.  Juxtapose a strong light with a strong dark in this area. Maybe have a pop of color that is fresh and not seen elsewhere. Small shapes and hard edges can help make an area more visually important.  Manipulate the paths of movement you create in order to bring the eye to this area.  Use shapes to point in the direction of that area.

This process is one of many that can be used to rescue a painting.  If you're open to possibility, and enjoy discovering your paintings as you go along, then this technique might be for you!  Since the foundational painting is already "Dead", then you are free to risk trying something new.  BE FEARLESS!  

I love to banish fearful thinking with this thought from Picasso: 

"I work on a painting until I completely destroy it.  It is then I begin to create." Pablo Picasso


Can anybody relate? I've destroyed a few paintings in my day, and I can imagine I'm not alone.  Now you can use that painting as a beginning point instead of a failure!


Good luck with trying this technique.  I'd love to see what you come up with...hopefully it will help you transform your failed painting into a WINNER!  


Subscribe to this blog and I'll include you in the release of my UPCOMING FREE VIDEO  here I will demonstrate this process and how I made the collage paper used in my winning painting.  To subscribe, just leave your email address in the box on the right side of the home page where it says "subscribe to this blog".  Then you will be the first to get an update in your inbox on any new posts.  The box may not be visible on mobile screens, but will be visible on the web version of this blog.  

Feel free to share before and after photos of your work with me. I'd love to do a follow up blog post so we can inspire one another... Share this blog with friends you think might enjoy it, or take this challenge on with your group of painting friends.  
Happy painting! =)

Rebecca Zdybel
Artist/Art Instructor
Myrtle Beach, SC
Share Love, Spread Light, DO ART! 


Sunday, January 4, 2015

In Pursuit of Ecstasy- How About You?


Anyone want to join me to go helipainting?!  Talk about being in pursuit of excitement!  You all know that I love to paint and travel.  It's become my favorite way to energize myself as an artist.  It brings me joy. 


Water soluble Pen and gouache

The idea that we are in pursuit of ecstasy as artists is so compelling.  I often maintain that once I'm "in the zone" and painting free, there's a surge of excitement and something akin to joy that overtakes me.  I attribute it to endorphins, but it is definitely euphoric, whatever the source.  
Watercolor, Ink, and Water-soluble crayon on gesso prepared paper

The Oscar Wilde is so descriptive of this phenomenon:

Ink and Water-soluble crayon

"We can have in life but one great experience at best, and the secret of life is to reproduce that experience as often as possible." 

Oscar Wilde- The Picture of Dorian Gray.


I hope today finds you in pursuit of ecstasy.  For those of you who are inclined, perhaps you'll be painting, drawing or creating your way to that kind of experience.  I hope so...
Plein Air painting using transparent and opaque watercolor and ink

"Try it!  You might like it!"

If you're looking for experiences which can light a fire in you, you may want to consider traveling.  Traveling with drawing and painting as an option can help you experience your surroundings more intensely.  It doesn't mean you need to paint or draw on location...although can be a great experience.  It doesn't mean you have to be an artist either.  Simply attempting to capture something about what you visit, or what you see can be a wonderful way of connecting with the places you visit.  
Pen and wash- Watercolor and Ink


Sometimes I take photos and draw or paint them later.  Other times I will search for images of the places I go and paint them.  Somehow, I like to create a visual record which has meaning for me in the places I go.  You might enjoy it as I do.  
I love journaling- this entry in my journal was done with Water-soluble pen and watercolor wash


For me, the record which I create helps me remember the places better...in fact, if I paint or draw it, I will never forget it.  
Pen and Watercolor wash

The photos in this blog are from my travel journal.  It is the best way I have found to prevent my trips from becoming a blur of jumbled memories and places.  If you are like me, you forget the names of the towns you visit and what you did when you got there.  My solution has been these journals.   I would encourage you to try this sort of pictorial journal for yourself and see if it doesn't help you cement the experience in your mind more clearly.  
Transparent watercolor


I would love to give you some suggestions and techniques for journaling your travels.  My class schedule is here on the website calendar.  Your next euphoric moment might just be awaiting you in class...or on my next EAT PAINT COOK tour of Tuscany this fall. I'd love to show you beautiful Tuscany Oct 3-10, 2015.  
Pen and gouache
Painting and journaling will be an OPTION on this trip, as will cooking lessons, but painting or cooking are not requirements.  They are simply additional activities which will be offered to participants.  During relaxation time for non-painters,  we will have a STUDIO for our use, which makes it convenient.  Hauling our art materials with us everywhere we go is unnecessary thanks to the studio.  We can simply do art together when we have some down time..or if we feel the urge.  After all, we don't need pressure on vacation!  Here's a link for the details about my EAT PAINT COOK TOUR OF TUSCANY ...

https://www.ilchiostro.com/index.php?action=workshop-details&item=283


Transparent watercolor


Let me hear from you! I read every comment and it means a lot to know you are out there reading.


Rebecca Zdybel
Artist, Instructor, Art-Travel Instructor
Art Lessons in all media
Myrtle Beach, SC
rebecca@artmyrtlebeach.com

Spread Light, Share Love, DO Art!


Feel free to share any of this blog post on your own blog or website, but I ask that you you include:
Rebecca Zdybel is an artist and instructor in Myrtle Beach, SC.  Follow her and see her work at http://www.artmyrtlebeach.com/


"Like" my facebook page: Rebecca Zdybel- Artist

Join me on Google+ Rebecca Zdybel Google+ Profile


PS-  I love this newsletter and would highly recommend it to anyone interested in thoughtful art oriented musings.  This latest example is why I love reading what Sara writes.  


Ecstasy

July 11, 2014


In his 1964 book, Religions, Values and Peak Experiences, psychologist Abraham Maslow broadened the definition and understanding of ecstasy. Instead of crediting solely the supernatural for our human moments of inspiration and interconnectedness, Maslow believed that the essential experience attributed to religion could be seen as a private revelation. A sacred consciousness is brought on by awareness, personal action and participation and is illuminated from within.

I once saw Swan Lake at the American Ballet Theatre at Lincoln Centre in New York City. Settling in as the lights dimmed and the chandeliers ascended, organza tutus appeared on the stage like soft, floating objects of meditation, gradating from pale pink to apricot, then an effervescent custard and dove -- a rainbow in slow motion of tertiary greys. A universal, intoxicating, multi-sensory eye massage hushed the audience into a state of breathlessness.

After the ballet, I stepped out into the Lincoln Center Plaza. Her central fountain skipped and splashed under a rosy moon and reflected the golden interior lights of the adjoining houses of worship: the Philharmonic, the Juilliard, the City Opera. I floated down Columbus Avenue in a state of euphoric appreciation -- a tumbling illumination and recalibrated artistic vision harmonized with the universe -- in innocence and wonder, in possibilities and understanding. The meaning of life and beauty appeared to me while bearing witness to the sweat and conviction of generations of fellow travellers in art.

"We can have in life but one great experience at best, and the secret of life is to reproduce that experience as often as possible," wrote Oscar Wilde in The Picture of Dorian Gray. Despite Wilde's sarcasm, as artists, we might build and multiply our highs to harness the awe, the growth, and the feelings of empowerment. Here are a few ideas:

Identify moments of ecstasy and when they occur.

Seek out and create experiences that can be identified as "peak aesthetic moments."

Recognize when you "switch on."

Go for a variety of triggers: simple, extravagant, strange, alone, comforting, challenging, shared.

Work the lingering creative edge gained from your revelations. Make it count.

Do it regularly.

Sincerely,

Sara

PS: "The person in peak-experiences feels himself, more than other times, to be the responsible, active, creating center of his activities and of his perceptions. He feels more like a prime-mover, more self-determined (rather than caused, determined, helpless, dependent, passive, weak, bossed). He feels himself to be his own boss, fully responsible, fully volitional, with more 'free-will' than at other times, master of his fate, an agent." (Abraham Maslow)

"I must create a system or be enslaved by another man's; I will not reason and compare: my business is to create." (William Blake)

Esoterica: Ecstasy is worth chasing when the results are your own personal boom of productivity. Possibilities may be close by or they wait in other worlds. Last August Dad and I joined plein-air painter and hiking guide Liz Wiltzen in the Canadian Rockies for an encounter with ecstasy called "heli-painting." This September 4 - 7, Liz carries the torch with American watercolourist and colour master Stephen Quiller. A few spots are still available for this plein-air experience of a lifetime. If you'd like to find out more, we've posted some heli-footage and information at the top of this letter online.

Sunday, December 14, 2014

Arty Party- Gather Your Group and HAVE FUN TOGETHER!

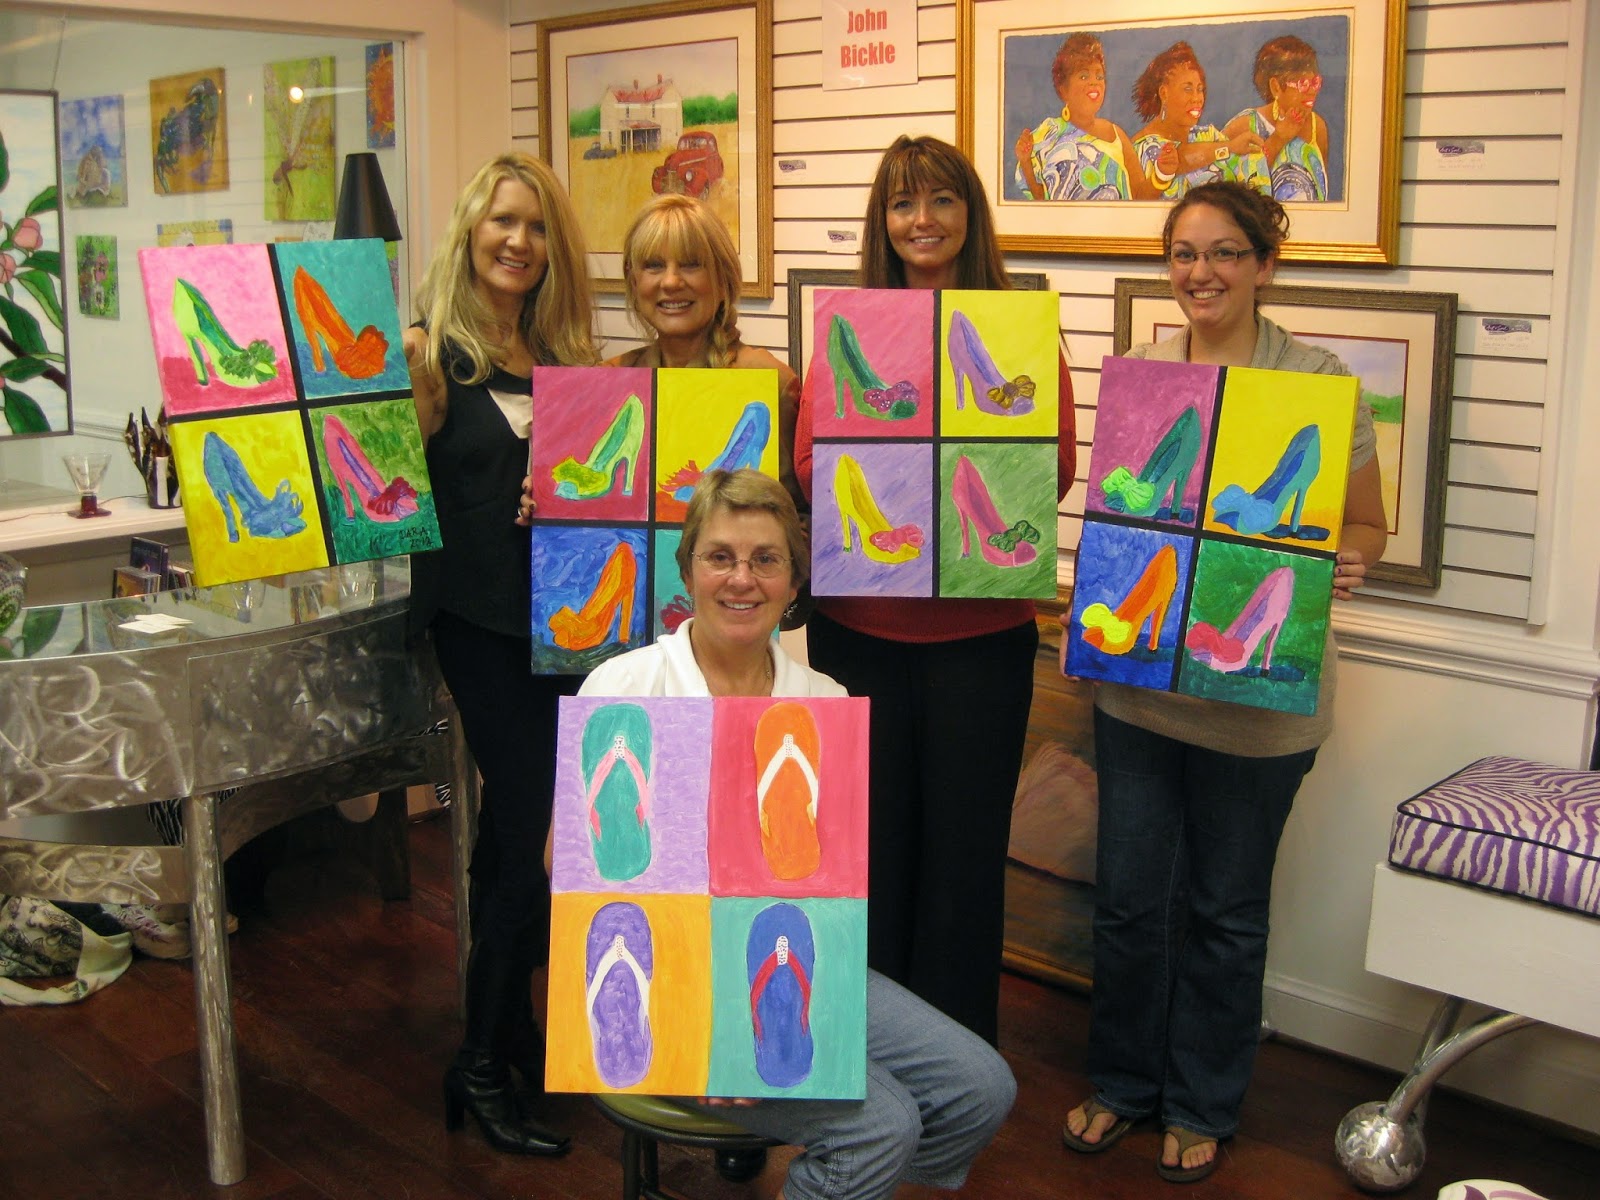
What kind of activity engages everyone: senior, TEEN and youngsters?    Tired of family watching TV or on their cell phones?  Try this idea...
Have an ARTY PARTY!  

Spend time together doing something UNUSUAL and MEMORABLE.   It's EASY- just contact me and we can make it happen!  

New Convenient Location near Barefoot Landing in Myrtle Beach!
I Was Fired In SC- Pottery Painting Studio
4021 Hwy 17 S, North Myrtle Beach, SC 

Here's how to schedule your event and lots of photos from past Arty Party fun...


Arty Party- Check out all the fun in these images from past parties!


Fun for family and friends...  You bring the smiles and I'll help you with everything else. 
Schedule your Arty Party TODAY!
Call or text 843-450-2307 
or email rebecca@artmyrtlebeach.com

Rebecca Zdybel
Artist, Instructor, Art-Travel Instructor
Art Lessons in all media
Myrtle Beach, SC
rebecca@artmyrtlebeach.com

Spread Light, Share Love, DO Art!

Feel free to share this blog post on your own blog or website, but I ask that you you include:
Rebecca Zdybel is an artist and instructor in Myrtle Beach, SC.  Follow her and see her work at http://www.artmyrtlebeach.com/


"Like" my facebook page: Rebecca Zdybel- Artist
Join me on Google+ Rebecca Zdybel Google+ Profile

Wednesday, September 24, 2014

Colosseum- Colossal Surprises!

Rome is magnificent and the buildings and architecture are incredible.  Both the scale and number of gorgeously intact buildings and ancient ruins boggles the mind.  They are everywhere!  Go around any corner, and you stumble on yet another architectural beauty. Of course, the most notable of these architectural wonders is the Colosseum.  We went on a tour today and found out a few fun facts...


Fact:  The Colosseum was not always called the Colosseum.  It's original name was the 'Flavian Amphitheater'.  The Colosseum derived it's current name from being adjacent to the "Colossus"- a huge bronze statue of Nero that has since been melted down and destroyed.  This is what it may have looked like:  


Did you know that the Colosseum had assigned seating and gates like a modern stadium? There was also fabric sheltering the spectators from above, supported by beams which protected all but the center of the Arena.  Sailors used drums to work together and haul the sailcloth into place. 


Fact:  "Arena" means "sand" and that very substance covered the floor of the Colosseum.  Sand acted as an absorbent surface for all the blood and gore which took place upon the arena floor and gave better footing to the combatants.  


Sand also disguised about 60 trap doors which served as "stage entrances" for actors in the various dramatic battles and events.  Animals and people would make their entrance onto the floor of the arena using elevators raised by slave-powered winches.  A diagram is pictured below. 


Did you know that Jewish Slaves built the Colosseum?  Rome destroyed the Jewish Temple and defeated the Jews in 70AD and then brought back 50,000 Jewish slaves and plunder from the Temple in order to construct the Colosseum?  It was begun in 72 AD finished in 8 years.  This Triumphal Arch of Titus commemorates the Roman victory and shows the plunder of Jerusalem being brought back to Rome by the slaves and soldiers. 


Triumphal Arch of Titus in the Forum which depicts the victory over the Jews in 70 AD. 

Did you know that most gladiatorial battles were man to man?  They did not always end in death, and there was quite a bit of incentive not to kill them, since their training and skill was very expensive to cultivate.  They trained just across the street in a private arena which was connected to the Colosseum by underground tunnel.  During games at the Colosseum, the gladiators generally fought in the afternoons, animals fought in the mornings, and executions took place around the noon hour.  A couple of tour guides maintain that it is unlikely that Christians were ever tortured there...but I haven't checked that fact out for historical truth. I know the Pope makes a pilgrimage there as a holy site every Lent, and I doubt he would do that because animals were killed there. 

Fact:  The exterior of the Colosseum is made of white Travertine?  It's a local stone which was very durable and easily available. Though it's original color was white, and it has only become the terra-cotta color we associate with it due to weather and age.  Can you imagine?  It's currently undergoing a 60 million Euro restoration, thanks to donations by a wealthy Italian businessman who owns Tods shoe company.  Its already partially restored to its original color.  

The Colosseum was decorated with painted statues and may have looked something like this in it's heyday (except it would have been white, right?).  Other amphitheaters were in operation throughout the empire, but in Rome, the Colosseum continued to function as a major center for these Roman games for around 500 years. 


Fact:  The Grand Opening Games of the Colosseum involved 100 days of games and overall they were responsible for the slaughter of over 10,000 animals?   Any small animals which were left, were often given to the people.  Every kind of animal was included in the games, because the goal was to thrill and entertain.  The Roman people did not have zoos or the ability to travel with ease, so bringing exotic animals out for display provided that shock and awe experience which the Emperors wished to provide.  Animals included everything from Tigers, lions, Elephants and Bulls, to Crocodiles, snakes, and small animals.    So many lions were killed during the games of the Roman Empire, that some believe these types of spectacles contributed to the eventual extinction of the European Lion.  


Were you surprised by any of these facts? We were fascinated.  If you're wondering which tour of Rome to take:  Our City Wonders tour was great, but 4 hours of climbing and walking on the rough stone surfaces of the Colosseum, the Roman Forum, and the Palatine Hill were quite demanding in the heat.  If you go, be sure to drink water, dress for the weather and wear good walking shoes! 

Let me hear from you! I read every comment and it means a lot to know you are out there traveling along with me.


Rebecca Zdybel
Artist, Instructor, Art-Travel Instructor
Art Lessons in all media
Myrtle Beach, SC
rebecca@artmyrtlebeach.com

Spread Light, Share Love, DO Art!


Feel free to share any of this blog post on your own blog or website, but I ask that you you include:
Rebecca Zdybel is an artist and instructor in Myrtle Beach, SC.  Follow her and see her work at http://www.artmyrtlebeach.com/


"Like" my facebook page: Rebecca Zdybel- Artist
Join me on Google+ Rebecca Zdybel Google+ Profile


Copyright 2012 Rebecca Zdybel.  All Rights Reserved.
Designed and Maintained by Myrtle Beach Website Designer