Showing posts with label Myrtle Beach art classes. Show all posts

Sunday, May 31, 2015

30 Day Drawing Challenge Day 30!!!- Destinesia: New Definition and It's CURE

30 Day Drawing Challenge Day 30- Our Final Day!

Poppies are everywhere in the Spring in Europe.  I found a portion of some lyrics by Robert Burns about poppies that spoke to me on many levels.  I included them in the background of my sketch. " Pleasures are like poppies spread,  you seize the flower it's bloom is shed. Or like a snowfalls in the river, a moment white then melts forever."  How beautiful is that?!!!  Ahhhh....
We have reached the end of our 30 Day Drawing Challenge.  30 days of drawing.  Wow!  What a great journey it's been to even write these lessons for you, and I hope it's been a pleasure for you to participate. Congratulations on arriving at the finish line!!!  You've made a huge commitment, and given yourself a gift for a lifetime.  Reach around and pat yourself on the back.  

When I see you next, I can't wait to give you a hug and share your reactions to these lessons in class.  Yesterday while you were drawing flowers, I spent a long day driving home from my painting sabbatical in Florida.  While there, I was pursuing a personal commitment to complete as many paintings as I could.  My goal was 30 Paintings, 30 Blogs in 30 Days, and I am happy to say that with a lot of hard work, and after today's blog, I will have done it.  Yay for all of us!  
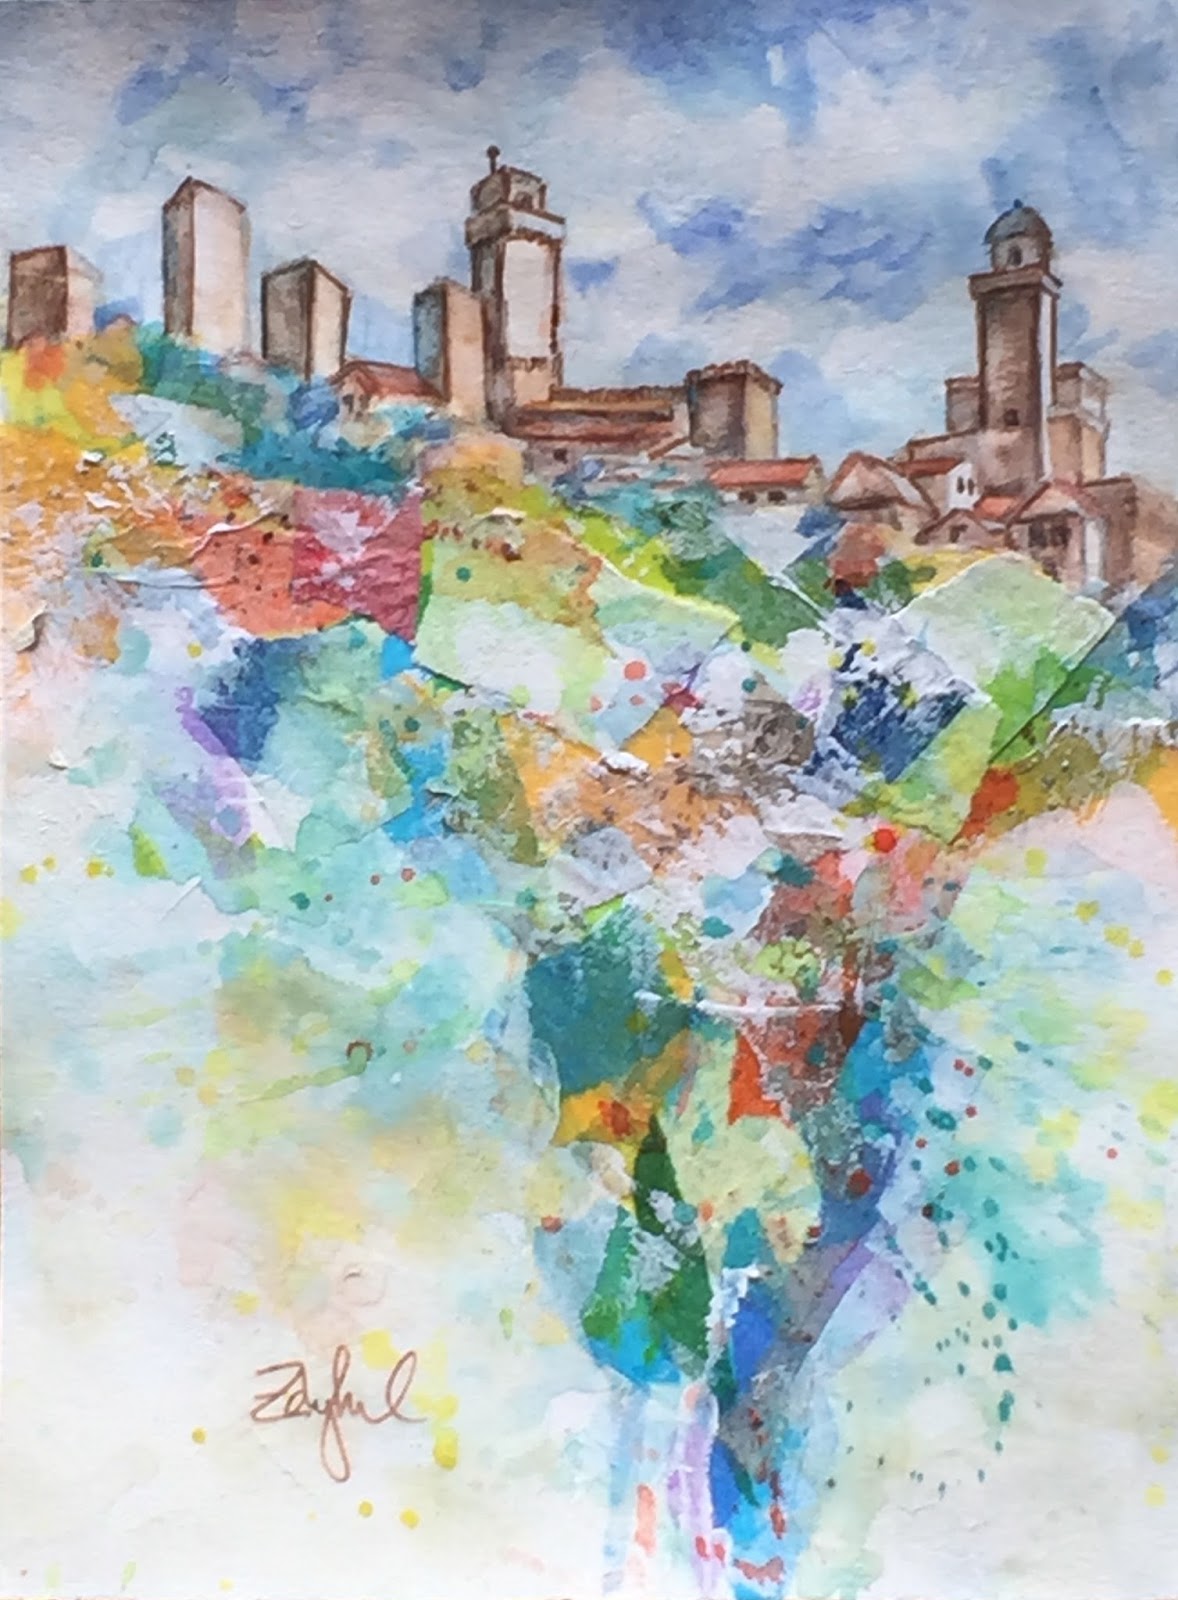

A new lesson for my upcoming EAT PAINT COOK Tour.
Can't wait to teach this and other art lessons in Tuscany!
"Tuscany's Emerald City- San Gimignano" ©Rebecca Zdybel

Today's challenge- Fighting "Destinesia" or The Secret to Remembering Your Travels

I stumbled across a new word the other day that got me excited- "Destinesia". You'll find it in the Urban dictionary, describing the phenomenon of going somewhere and forgetting why you went there in the first place.  Thankfully, that isn't much of a problem for me. However, I needed a way to describe another frequently experienced phenomenon for which I did not have a good word.  Destinesia seemed the perfect word. So, So, I humbly submit this alternative definition for Destinesia: 

Destinesia:
  • Going someplace and not remembering much about it. 
  •  Difficulty remembering where you've been...


If you travel, you can probably relate.  You go to a town, you see the local church or the center of town, you walk around, stop and shop, have a snack or a meal, and go on to the next place.  Then you go home, and you can't remember the name, or anything more specific about the place.  You look at photos and think...hmmm.  Where was that?  
My sweet traveling companion- Maggie <3 We had so much fun in Greece! 


For a time, this phenomenon became a discouragement to traveling for me.  I got tired and bored of seeing new places and not feeling like they moved me or impacted me very much.  

Then I discovered ART focused travel and everything changed!  Now I can't get enough of going new places, drinking them into my soul and my memory banks by recording them with drawings and paintings.  

Parthenon- Athens, Greece  ©Rebecca Zdybel

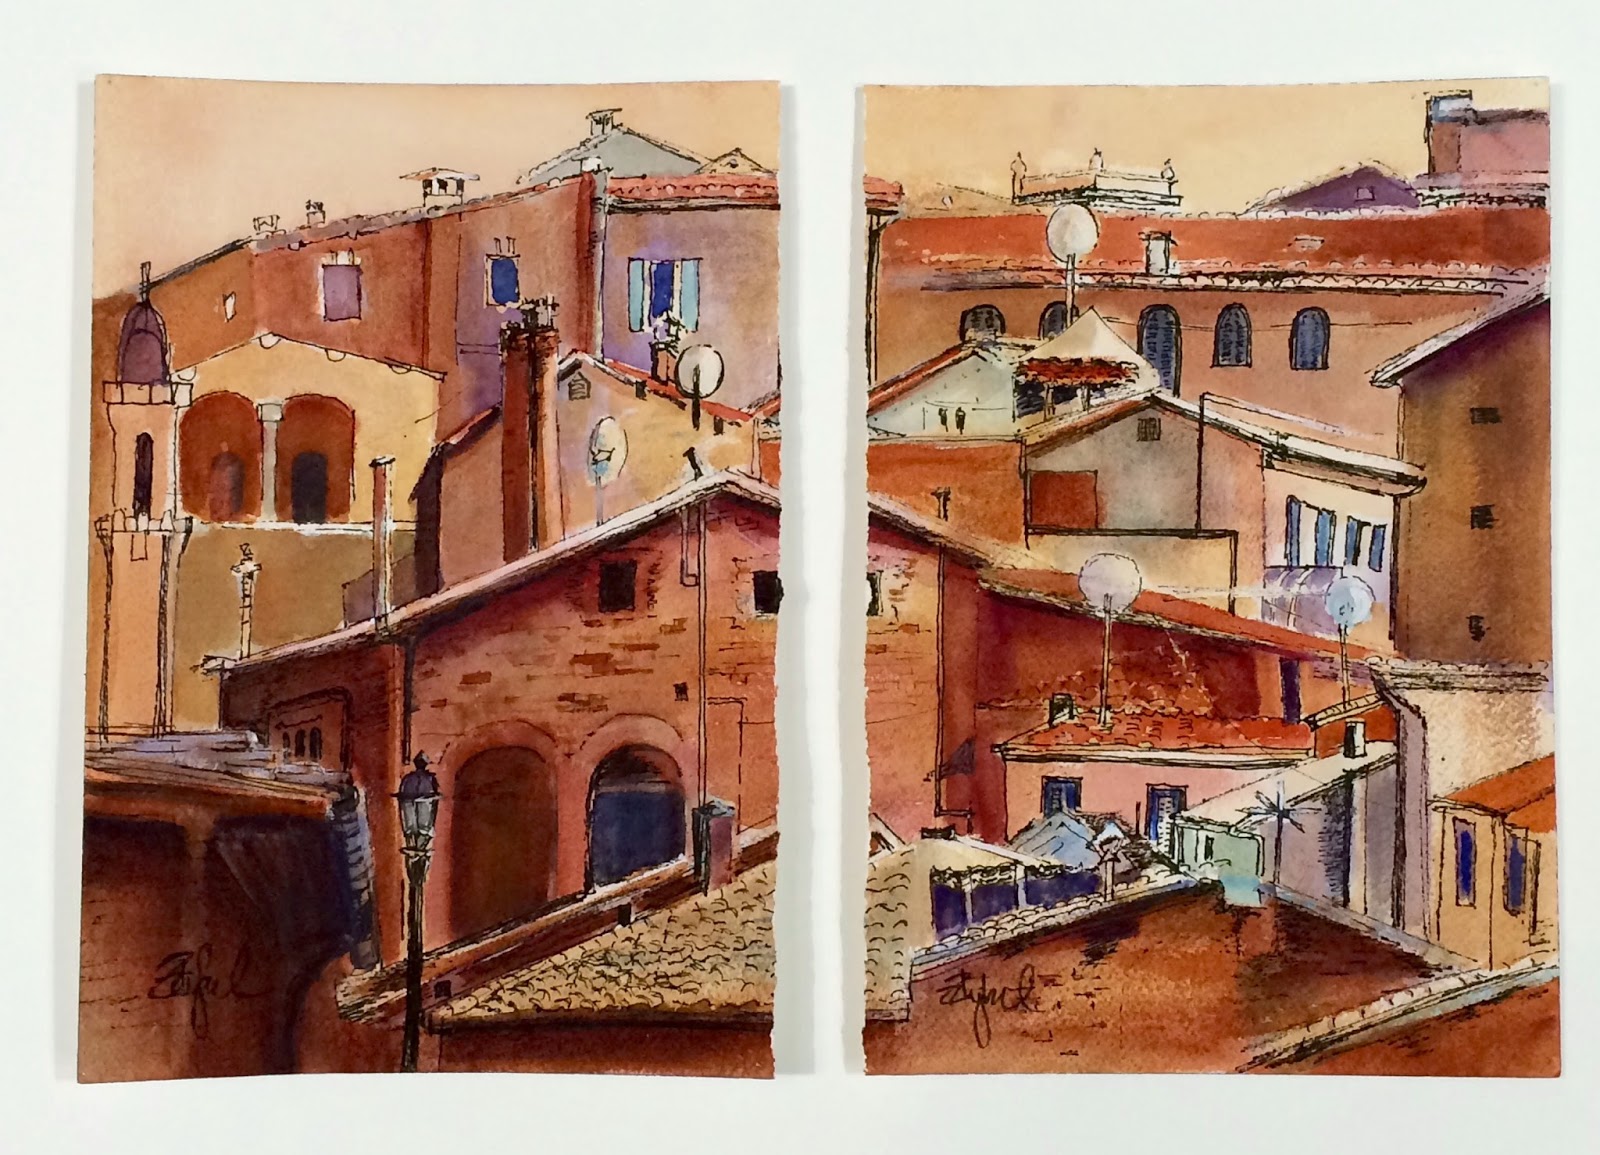
Siena Rooftops 1 and 2 ©Rebecca Zdybel
The buzz of this kind of travel has become so euphoric that I have determined to spend 6 weeks traveling this autumn.  It's scary and exciting all at the same time!  I'm so grateful to have the opportunity to experience this kind of adventure and can't wait to record the journey artistically.  The quiet little corners, the sounds, the smells, the encounters with people, all lead to beautiful mental vignettes for me as I draw and paint them.  They've also resulted in some sentimental art journals that I love to share.  In this modern era, we all over-document our lives with photos.  Creating these art journals has shown me time and again how sketches are so much more personal, and people enjoy sharing them with me. Nobody wants to look at my photo albums, but they actually enjoy seeing the art journals. These sketches tell a different story than a photograph ever could.  There is real joy for me in seeing the reaction of others, and sharing the stories attached to the sketches.  I predict you might have the same experience if art journaling became part of our travel routine

I'd like you to experience this for yourself.  If you cannot travel with me, then you can at least record a place you've visited and connect with that place again, even now... 
The idyllic courtyard at beautiful La Finca Del Niño in Spain
Gateway to Heaven ©Rebecca Zdybel


So here is your Drawing Challenge for Today:  Fight Destinesia and DRAW a place you have visited

  • Think of a place you've visited and loved.  Go back through your photos, or go to Google Images and search for images of that place. (If you missed Day 28's lesson on how to do this here is the link: How to use Google Images)
  • Take that image and draw it using one of the many different approaches to sketching you've learned during this challenge.  Here's a short list of ideas for techniques (all of them are associated with lessons from this 30 Day Challenge): 
    • Draw with a water soluble marker (e.g. Elegant Writer or Tombow)
    • Do a continuous line contour drawing of your subject 
    • Draw your photo reference upside down
    • Draw the negative spaces within and around the positive shapes in your photo
    • Vignette your subject 
    • Add words to tell a little story about why that place has meaning for you
    • Frame your subject with lines or words
    • Create a toned ground and sketch your subject on that surface
    • Add shadows to create linkage between multiple subjects
    • Add watercolor to your sketch 
    • Create a Zentangle within your sketch
This list could go on and on... You can use any of my ideas or think about coming up with YOUR OWN approach to the subject.  I've given you wings, now it's time to FLY!!

If you feel the wind beneath your wings and like the idea of an ADVENTURE with ART as a FOCUS, I encourage you to come with me to TUSCANY.  My next big adventure will include my EAT PAINT COOK Tour of Tuscany Oct 3-10, 2015.  I have a really nice group of people assembling around this trip, and we look forward to incredible food, scenery, art lessons, and cooking classes, capped off with live music in the evenings.  You can see my brochure here on my website: EAT PAINT COOK Tour of Tuscany- Click this link

New Classes Begin: 

Watercolor Wednesdays 1-4PM Begin again on June 10
Saturday Sessions 1-4  will begin June 13 
(Reserve your seat in advance for all classes, please)
Be sure to check my calendar on the website for any changes in schedule. Contact me for more info: Rebecca@artmyrtlebeach.com

My website will be changing platforms soon:  If you are a current subscriber a notification will soon arrive in your inbox and ask you to confirm your subscription again.  Just click that confirmation and you will continue to receive updates to this blog directly to your email inbox.  You can become a subscriber by entering your email into the box along the right edge of my homepage (in desktop view).  If you are a mobile subscriber, you may need to go to desktop view to see it.  If you'd like to subscribe and have not been able to do so, please email me and I will send you a link.   My email address is rebecca@artmyrtlebeach.com.  

I have lots of new ideas and lessons I plan to share.  I also will be traveling extensively during September and October and will be blogging about my adventures and my art along the way.  If you subscribe today you'll be kept up to date and share the all the fun. I hope you do! <3 


This scene was just down the street from my hotel in Toulouse.
Bienvenue à Toulouse ©Rebecca Zdybel

These Banana trees were everywhere in Spain.
Banana Beach  ©Rebecca Zdybel


Rebecca Zdybel
Artist, Instructor, Art-Travel Instructor
Art Lessons: Drawing, Watercolor, Acrylic, Collage, Mixed Media
Myrtle Beach, SC
rebecca@artmyrtlebeach.com

Spread Light, Share Love, DO Art!

Feel free to share any of this blog post on your own blog or website, but I ask that you you include:
Rebecca Zdybel is an artist and instructor in Myrtle Beach, SC.  Follow her and see her work at http://www.artmyrtlebeach.com/


Join me on Google+ Rebecca Zdybel Google+ 

Saturday, May 30, 2015

30 Day Drawing Challenge Day 29- Draw Flowers

30 Day Drawing Challenge Day 29- Draw flowers


Elegant Writer and Watercolor 
Tombow 947 and Watercolor
Congratulations! Tomorrow you will be able to say you committed and completed 30 Days of Drawing!  I was discussing the joy and the zen of drawing yesterday.  I paint, and of course I love painting.  I also love to draw and sketch, and surprisingly I sketch for a little different reason.  When I draw, I am very present wherever I am.  I am seeing intently and noticing my surroundings.  When I paint, I tend to be transported and the process is more "otherworldly".  I'm not sure if anyone else can relate to that, but there it is. If you have thoughts on this I'd love you to comment and hear your opinions.

That's why I love to draw and paint on location.  Art journaling is incredibly fun and almost my preferred way to make art when I travel...it forges an incredible bond with wherever I am.  I hope you'll pardon me taking a moment to encourage you to join me for my EAT, PAINT, COOK Tour of Tuscany Oct. 3-10, 2015.  It is art travel at it's finest.  It's incredible...and I'm not just saying that!  Drawing, Painting, Eating chef prepared meals, seeing gorgeous Tuscan hill towns and vineyards, sampling local wines, cooking lessons, drivers to all our destinations, and music in the evenings...ahhh, I can't wait to get back there and would love to have you join me!  See the brochure on my home page in desktop view, or follow this link:  Eat Paint Cook Tour of Tuscany 10-3 to 10-10-2015
Misty Morning in Tuscany ©Rebecca Zdybel
The view from one of our little hill towns is panoramic
and lends itself to paintings like this little watercolor sketch.
Join me and I'll take you there and show you how...

During our 30 Day Challenge, you've processed a truckload of information, so I'm going to keep it simple today and let you get right to it.  Let's celebrate spring and the glorious beauty of flowers!  

Today's Drawing challenge: 

  • Take some real flowers, or real artificial flowers and draw from life, OR find a photo reference and use that for your drawing.  You may use any materials you'd like
  • When finished you can send me a photo!
Here are a few sketches from fellow artists and past days of the Challenge:


So much fun to see what you do with these challenges!

Special Notice: 
My website will be changing to become more mobile friendly and add some new features.  If you are a subscriber, you will need to update your subscription.  A new notification will soon arrive in your inbox and ask for you to confirm your subscription.  It will be from my website server.  Just click that confirmation and you will continue to receive updates to this blog directly to your email inbox.  There is a button on my home page that allows you to subscribe, but if you'd like to subscribe and have not been able to do so, please email me and I will send you that link.   My email address is rebecca@artmyrtlebeach.com.  I have lots of new ideas and lessons I plan to share over the next few months.  I also will be traveling extensively during September and October and will be blogging about my adventures and my art along the way.  If you subscribe today you'll be kept up to date and share the all the fun!  I hope you do... <3

Rebecca Zdybel
Artist, Instructor, Art-Travel Instructor
Art Lessons: Drawing, Watercolor, Acrylic, Collage, Mixed Media
Myrtle Beach, SC
rebecca@artmyrtlebeach.com

Spread Light, Share Love, DO Art!

Feel free to share any of this blog post on your own blog or website, but I ask that you give attribution and include:
Rebecca Zdybel is an artist and instructor in Myrtle Beach, SC.  Follow her and see her work at http://www.artmyrtlebeach.com/


Join me on Google+ Rebecca Zdybel Google+ 


Wednesday, May 27, 2015

30 Day Drawing Challenge Day 26- Free Draw

30 Day Drawing Challenge Day 26- Free Draw

Day 26 of our 30 Day Drawing Challenge will be a chance to draw in your own way, with your own choice of tools.  I've given so many options over the course of this challenge.  Today you can try something again that you enjoyed, or take something that was difficult and practice it another time.  Perhaps you could combine ideas from a few different days...

©Rebecca Zdybel
For my example above, I again used the Tombow Marker 947 which I recommended you purchase.  (If you would like to get one, it's around $5-6. Here is a link:  Tombow 947 Marker- Amazon)  I then formatted with a frame and added words for content.


For this example, I searched Google for a quote about orchids.  
Then I included it as part of  my sketch.
Contour Drawing with Tombow 947 Marker and Watercolor. ©Rebecca Zdybel 

Here are some more ideas:
  • Bring Balance and Content to your sketch with words...as I have in some of these sketches. For some examples of great fonts you might use follow this link:  30 Day Drawing Challenge Day 13- Find a Favorite Font
  • Create a vignette version of your image or soften the background around your image.  Here's the link that explains how to do it:  30 Day Drawing Challenge Day 17- How to Vignette
  • Think about formatting your image after drawing it by creating a frame that contains or intersects your image in an interesting way. Part of learning how to draw, is learning how to present your drawings and compose your work. These little drawing tricks are very helpful, but they need practice!  
    • Frames, words, and a little pop of color can add pizazz and lend composition to a solitary image.  Kind of like dressing it up or putting on makeup.  Your drawing may be inherently good looking, but it may look better with a little sumpthin' sumpthin' (that's how we say it down here in the South). I explain this concept more fully here: 30 Day Drawing Challenge Day 12- Draw, Format, Paint

Notice how the tape pattern on the brush handle is repeated in the background frame.
The curves of the lettering are also repeated in the curved edges of the frame.  This repetition brings harmony and improves the design of an otherwise simple sketch.  ©Rebecca Zdybel

Whatever you do, I hope you enjoy the meditative and personally rewarding aspect of making time to draw.  When you do, you will really see what's in front of you.  My time spent on art is always enriching, and I hope your time spent on this challenge ends up making you feel the same.  I'll be back with another challenge for you tomorrow...

Don't forget to send me your drawings! rebecca@artmyrtlebeach.com

Special Notice: 
My website will be changing to become more mobile friendly and add some new features.  If you are a subscriber, you will need to update your subscription.  A new notification will soon arrive in your inbox and ask for you to confirm your subscription.  It will be from my website server.  Just click that confirmation and you will continue to receive updates to this blog directly to your email inbox.  There is a button on my home page that allows you to subscribe, but if you'd like to subscribe and have not been able to do so, please email me and I will send you that link.   My email address is rebecca@artmyrtlebeach.com.  I have lots of new ideas and lessons I plan to share over the next few months.  I also will be traveling extensively during September and October and will be blogging about my adventures and my art along the way.  If you subscribe today you'll be kept up to date and share the all the fun!  I hope you do... <3

Here are some photos of fellow challengers' sketches...

Elegant Writer markers in various colors.  Nice vignette in the background!  

Zentangle is addicting...and when they turn out this well you can see why! Here's a link to my lesson on How to Zentangle from Day 20: http://www.artmyrtlebeach.com/2015/05/30-day-drawing-challenge-day-21_21.html


From Day 26- Draw a Teacup.  Beautifully done!
Happy Drawing!
I'll look forward to seeing what you do in your "free" time today. Don't forget to send me photos of your drawings =)


Rebecca Zdybel
Artist, Instructor, Art-Travel Instructor
Art Lessons: Drawing, Watercolor, Acrylic, Collage, Mixed Media
Myrtle Beach, SC
rebecca@artmyrtlebeach.com

Spread Light, Share Love, DO Art!

Feel free to share any of this blog post on your own blog or website, but I ask that you you include:
Rebecca Zdybel is an artist and instructor in Myrtle Beach, SC.  Follow her and see her work at http://www.artmyrtlebeach.com/


Join me on Google+ Rebecca Zdybel Google+ 

Tuesday, May 26, 2015

30 Day Drawing Challenge Day 25- Draw a Teacup

30 Day Drawing Challenge Day 25- Draw a Teacup

This sketch was done initially as a contour drawing with Tombow 947 Water-soluble Marker. Watercolor and permanent black marker also used. 
 Note the color in these shadows!  ©Rebecca Zdybel 

Guess what we are going to draw on Day 25 of our 30 Day Drawing challenge?  

That's right, a teacup.  

I've been asking a lot of you throughout the course of this challenge.  After trying lots of new things, a bit of review might be time well spent. You've earned a day where you get to make some choices in how you will draw.  Today I am only going to suggest the subject matter.  The method you use will be up to you.  


This sketch was done from life with only a Tombow 947 marker.  I had afternoon tea at a lovely Tea Room here in Venice, FL and took the opportunity to record the moment with this sketch.  So fun!  ©Rebecca Zdybel

I like to collect old china teacups, and lately I've been enjoying drawing them as well. We all probably have teacups somewhere in the cupboard, though yours may not look like mine.   Your assignment for today's drawing challenge is to find a teacup and draw it.  I want you to use all your new superpower drawing skills!  They are now becoming more finely honed with each passing day, so I'm giving you freedom to channel them...here's some thoughts:  
  • Think about bringing color into your shadows.  If you use your Tombow marker again today, it will already impart a bit of color if you make it run with a wet brush.  The same would be true of other water-soluble drawing materials. 
  • Consider whether you want to create a contour drawing of your subject or how you wish to approach it. (both of my sketches here began with contour drawings).  
  • Perhaps you'd like to use continuous line contour, begin with a Toned Ground or take a photo and draw it upside-down.  If you're not familiar with these approaches, then you can refer to these previous lessons by following these links: 
  • What drawing tool will you use?  Tombow markers, Elegant writer, Pencil or perhaps some other new favorite drawing tool.  Use this lesson as an excuse to try something you've not yet tried, or to pull out something you know and love.  Whatever you choose will be perfect!
  • Will you simply draw, or will you possibly add watercolor or mix drawing tools together in the sketch?  You decide.

When you finish your sketch, photograph it and send it my way so we can share the fun.  Here are a couple of nice sketches from challengers that have recently come my way: 


Day 24- Tombow Marker Sketch
Day 23- linking shapes with shadows


Enjoy your practice and I'll be back tomorrow with another fun challenge to get a fire lit under your sketchbook... or something like that ;-)


Rebecca Zdybel
Artist, Instructor, Art-Travel Instructor
Art Lessons: Drawing, Watercolor, Acrylic, Collage, Mixed Media
Myrtle Beach, SC
rebecca@artmyrtlebeach.com

Spread Light, Share Love, DO Art!

Feel free to share any of this blog post on your own blog or website, but I ask that you you include:
Rebecca Zdybel is an artist and instructor in Myrtle Beach, SC.  Follow her and see her work at http://www.artmyrtlebeach.com/


Join me on Google+ Rebecca Zdybel Google+ 

Sunday, May 24, 2015

30 Day Drawing Challenge Day 23- Linking Shapes with Shadows

30 Day Drawing Challenge Day 23- Linking Shapes with Shadows

Linkage is a design fundamental that describes the process of bringing unity to a piece of art by building connections.  Connections bring harmony and balance and all kinds of good design qualities to your work.  These connections can be made in many ways, but actual physical linking of shapes isn't always possible or may not make sense in your composition.  This is where shadows can play a very convenient role!

Designing better shapes is something we should all be thinking about.  Linking shapes is a really great way to achieve this.  For example, it's often a good idea when possible to take a series of repetitive small shapes and bring them together with connecting shapes.  This can create larger and more interesting shapes, or bring variation to what would otherwise be simple repetition. Again, this is a role that shadows were born to play!

Shadows can be anything from short and stubby to long and lean.  They can go in any direction.   They can GROW if needed to fill gaps.  They can also have color!

(We explored Color and Shadows in Day 21 of our 30 Day drawing challenge- Here's the link in case you missed it: 30 Day Drawing Challenge Day 21: Shadows/Color )

For all these reasons shadows are the perfect means for designing better shapes and creating linkage within your work.


An example of how you can GROW shadows to connect otherwise disconnected shapes ©Rebecca Zdybel 

Today's Challenge: 


Step 1: Draw 3-5 disconnected shapes using a contour drawing and ink.  I love clothespins as a subject, but you can pick anything (toothbrushes, brushes, pencils, crayons...etc.)

Hint: Leave gaps here and there in the contours of your objects to allow for color to visually flow in and out of the shapes and allow for a sense of bounced color from shadow to object. 

Step 2: Use shadows to connect your shapes and form a unified drawing.  Watercolor, watercolor pencils, or watercolor crayons would be a great to use in order to create colored shadows, but colored pencils or markers could also work well. 

Note that my shadows are not realistic, but they serve to connect my shapes together and create linkage.  They also provide a cool complementary color to the warm oranges of the clothespins.  

Step 3: Send a photo of your final result to me:   rebecca@artmyrtlebeach.com

Have fun with this drawing and file the idea away for future compositions when you sketch!  As we learn to draw, these little tricks of the trade can make our work so much better, and they are not that hard.  You just need to spend a little time digesting them. =)

Here are some drawings from the sketchbooks of more fellow Drawing Challengers:  

These all illustrate a very great danger in going down the Zentangle path...IT'S ADDICTIVE and very meditative...and BEAUTIFUL when done like these drawings demonstrate. Wow!  If you missed that lesson, it's available following this link. If you go there beware of the risk of instant addiction! 30 Day Drawing Challenge Day 20- Zentangle


I'm already looking ahead to later this week.  I will be breaking out my Tombow marker in burnt sienna color -947 for a sketch or two during the final couple of weeks of this challenge.  If you would like to get one, it's around $5-6. Here is a link:  Tombow 947 Marker- Amazon

Rebecca Zdybel
Artist, Instructor, Art-Travel Instructor
Art Lessons: Drawing, Watercolor, Acrylic, Collage, Mixed Media
Myrtle Beach, SC
rebecca@artmyrtlebeach.com

Spread Light, Share Love, DO Art!

Feel free to share any of this blog post on your own blog or website, but I ask that you you include:
Rebecca Zdybel is an artist and instructor in Myrtle Beach, SC.  Follow her and see her work at http://www.artmyrtlebeach.com/


Join me on Google+ Rebecca Zdybel Google+ 

Monday, May 18, 2015

30 Day Drawing Challenge Day 18- Draw a Cube

30 Day Drawing Challenge Day 18- How to Draw a Cube

We've been having such fun with drawing contours and vignettes, but this drawing challenge would be incomplete without touching on a subject that involves perspective...the dreaded "P" word!  It's something which most non-artists don't understand.  I've also found that many of my adult students of art have skipped right over this subject on their way to painting pretty pictures.  It's possible to paint or draw without knowing perspective, but it's a fundamental of drawing which will undermine your work if you don't understand it.

The best way I know to sum up perspective is with these 3 points:

  • Every realistic image you draw or paint has a horizon- and that horizon is always at the viewer's eye level.  Hmmm, let's think about that.  So what I'm saying is that the horizon will always be located at the level of the eye of the viewer. Plain and simple.  Not hard, right?
  • Due to the earth curving away from us, parallel straight lines will seem to recede to one point as they move away from us. That point is called the "disappearing point".  That disappearing point is ALWAYS SOMEWHERE ON THE HORIZON LINE.  Ok..that isn't too hard either, right?
  • Parallel lines will always recede to the same point.  So this means that any line which is running in the same direction as other lines will recede to the same point. 

3 points, but none of them are too tough, right?  

Ok, then let's draw a box.  It's not easy, but it illustrates this concept.  Don't stress...just follow the steps and use my drawings as reference.  Trust me!  If you've never done this before, it's information worth knowing. 


Step 1:  Draw the closest corner of the box with a vertical line.   This is always how I would recommend beginning to draw a cube. This line representing the closest corner is going to be referred to as Line A.  
Step 1 and 2
Step 2: Draw a horizon line going across the page.  Make a mark somewhere to the left of the paper and another mark toward the right edge of the paper.  These will be your disappearing points.
Step 3

Step 3: As in the drawing above, draw a light line from the top and bottom of the line in Step 1 to each disappearing point.  This will form 2 triangles.  These lines will serve as guidelines for forming your box.  Eventually we will erase portions of them.  
Step 4

Step 4: Using the guidelines, and my drawing above as an example.  Draw two vertical lines- 1 left of Line A and 1 right of Line A.  Keep them within the guidelines.  These lines will form the right edge and back left edge of your box. 

Step 5:  From the bottom of the back left edge line, draw a line  connecting it to the same disappearing point as the bottom of the front of the box.  They both recede to the same disappearing point because they are parallel.  

step 5 and 6
Step 6:  From the Top of the Right edge draw a line to the disappearing point on the left.  It recedes to the same point as those lines from the left side of the box, because why?  Because they are parallel, or running in the same direction.

Step 7: One more line to create, and it's a bit tricky, but just look at the photo if it's confusing.  Connect the bottom of the right side to the left disappearing point.  This is creates your final line of recession and should form an "x" under the "x" above it.  Connect between the two "x's" with a line to form the back right corner of the box.  Here's another photo with arrows pointing to the "x's"...
Step 7 again
Step 8: Draw a line connecting the two "x's".  This will form the back right corner as in the photo below. 
Step 8- A Cube in 2 point perspective


There you go!  You've drawn a cube in 2 point perspective.  This shape forms the basis of most architectural drawing and can be helpful drawing many other forms as well.  

Step 9: To reinforce your understanding of drawing the cube, I would suggest you draw it again.  Refer to my directions ONLY if you forget what to do.  Try to draw the cube until you feel like you own the concept.  
Once finished, take it easy and let the understanding sink in for today.  If you've drawn it 2 or 3 times, then you've done enough. 

Congratulations!  You have learned a VERY important concept about perspective!  You are officially a little bit smarter now.  Enjoy the rest of your day and I'll meet you here tomorrow...

PS- If you haven't sent me any photos of your drawings lately...be sure to send them my way so I can include them in future posts...anonymously of course.  Be sure to tell me what lesson you are illustrating and what tools you used in your sketch.  Can't wait to see what you've done!

I'm already looking ahead to later this week.  I will be breaking out my Tombow marker in burnt sienna color -947 for a sketch or two during the final couple of weeks of this challenge.  If you would like to get one, it's around $5-6. Here is a link:  Tombow 947 Marker- Amazon

Happy Drawing!!

Rebecca Zdybel
Artist, Instructor, Art-Travel Instructor
Art Lessons in all media
Myrtle Beach, SC
rebecca@artmyrtlebeach.com

Spread Light, Share Love, DO Art!

Feel free to share any of this blog post on your own blog or website, but I ask that you you include:
Rebecca Zdybel is an artist and instructor in Myrtle Beach, SC.  Follow her and see her work at http://www.artmyrtlebeach.com/


Join me on Google+ Rebecca Zdybel Google+ 

Friday, April 10, 2015

How to Save a Failed Painting- "Take YOUR Painting From the Boneyard to Best in Show"


There is hope for the hopeless!  

Maybe you have a stack of dead soldiers in your army of past paintings. "Never throw away an old painting".  I've heard it often, maybe you have too.  It's good advice.  Today I share the technique used to breathe new life into a once-dead painting.

Take YOUR painting from the Boneyard to Best in Show =)

Whether you would call it reincarnation, evolution, or resurrection, this Easter weekend I celebrated more than one miracle.  Two of my paintings won awards in the Spring Seacoast Artist Guild Show on Saturday night.  It felt like a miracle, because I knew the secret history of the winning painting.  I knew that it had once been pronounced DOA (Dead on Arrival), and yet here it was sporting a big ribbon and "SOLD" on the tag.  Talk about transformation!  I thought it would make a lesson worth teaching and a story worth telling to both my students and you...
"Out of the Shadows"- mixed media watercolor on Paper
"Best In Show 2015" Spring Seacoast Artist Guild Show
 Collection of Glen and Martha Sledge

If you're like me, you have stacks of paintings.  There's the stack of paintings which are complete.  If I love the painting, it gets put in the pile headed for the frame shop.  Since this is an expensive pile, it tends to be my smallest pile.  

If I'm not sure whether a painting is complete or not, it goes in the "To Do" stack of paintings (often my biggest stack).  

If a painting is lost and I'm pretty sure it's beyond redemption, then it goes into the pile I don't show anyone.  It's squirreled away in a box in the closet. 
I call it "the Boneyard".  

How to Save a Failed Painting- Turn Your Failed Painting into a Prize Winner!

Step 1:
Go to your boneyard or your "I don't know what to do with it" pile and find a painting that you'd like to reinvent.  I would suggest something with good color harmony.

  • You could also look for the following:  exciting line quality, nice value patterns, interesting shapes, patterns you enjoy, or maybe a cool texture.  Any of these might be used as the foundation for a new painting.  

Here is a painting very similar to the failed painting used as the foundation for "Out of the Shadows" shown above.

As you can see, it was a dominantly warm painting, with some horizontal movement. It failed to pass muster, so there it sat.  DOA.  The mood created  by the harmonious color was promising, so it became the basis of this exercise.


Step 2:  Ask Yourself, "What If...?"

I liked the color harmony and asked "What If...?"  When I ask this question, magic can happen.

This time the question was, "What if I make a collage paper that organizes my painting into a good design?"  Good design is fundamental to successful paintings, and so I chose a design form I tend to like:  Strong Verticals.  Here are some other examples of images with strong verticals:
Strong Verticals add a sense of organization to even a minimalist arrangement. 
What Lies Beyond- Rebecca Zdybel Acrylic on Canvas


Painting with vertical composition by Bob Burridge- Love his work!

Since my painting was a horizontal, I turned it on it's side to create a vertical orientation.  (yes, that's allowed!)  If you'd like to take your old painting and do something similar, decide on the best orientation for your piece.

Step 3:
Take some collage paper pieces, and lay them down to create a vertical organization.  Or collage over your painting with collage pieces that contain vertical elements.

Adhere the collage to your failed painting in various vertical shapes using either thinned Yes! paste or acrylic matte medium.  Let the underpainting show through in various ways.  Or, in as in my case, you could adhere translucent collage paper over the entire painting.  If you wish, you can then reveal the underpainting in various ways.

4. Always Strive for "Harmony, with Variety"

 I use Harmony an overriding principle.  Be ready to sacrifice everything for the sake of Harmony.  If you have harmony and unity, I guarantee your painting will hold together.  Set a goal of repetition with exaggeration and variety...in this case, we are going to exaggerate color temperature and organize shapes to create vertical movement.  This is how exaggeration helps a painting.  By emphasizing a design plan, we will likely create a sense of dominance, and that dominance will bring harmony to the painting.

5.  After adhering your collage- Paint on top of the collage, or paint negatively around the collage to accentuate or embellish the painting.  Create movement and trails for the eye to follow.  Do this using color, value, shapes or lines.  Our eyes look for stepping stones to follow and as artists we can make this happen for our viewers.  Remember, as the artist, YOU are in charge of where the eye will go.

Remember this design fundamental:  Repetition with Variety

Be careful not to do the same thing over and over in the same way.  Every time to you repeat yourself, do it a bit differently.  Think of it this way.  If you listened to a note on the piano and the same note was played in the same octave at the same volume with the same rhythm, it wouldn't take too many of those notes before they made you crazy.  Vary your notes.

Not a musician?  As an artist your notes are your shapes, colors, lines...whatever you create.  Vary their size, their direction, their color, their edge quality, their texture, their pattern, their value.  This variation, will keep your painting from being boring.  Be anything but dull!  Push your paintings, exaggerate, risk going too far.  Especially in watercolor, I think the tendency is to be safe, and sometimes that results in dull work.

6. Create a Focal Area or center of interest: To establish an area of interest or a focal area and entertain the viewer with a little "surprise".  For example: in a predominantly warm painting with light colors, it might be nice to have a cool dark in an area of interest.  Juxtapose a strong light with a strong dark in this area. Maybe have a pop of color that is fresh and not seen elsewhere. Small shapes and hard edges can help make an area more visually important.  Manipulate the paths of movement you create in order to bring the eye to this area.  Use shapes to point in the direction of that area.

This process is one of many that can be used to rescue a painting.  If you're open to possibility, and enjoy discovering your paintings as you go along, then this technique might be for you!  Since the foundational painting is already "Dead", then you are free to risk trying something new.  BE FEARLESS!  

I love to banish fearful thinking with this thought from Picasso: 

"I work on a painting until I completely destroy it.  It is then I begin to create." Pablo Picasso


Can anybody relate? I've destroyed a few paintings in my day, and I can imagine I'm not alone.  Now you can use that painting as a beginning point instead of a failure!


Good luck with trying this technique.  I'd love to see what you come up with...hopefully it will help you transform your failed painting into a WINNER!  


Subscribe to this blog and I'll include you in the release of my UPCOMING FREE VIDEO  here I will demonstrate this process and how I made the collage paper used in my winning painting.  To subscribe, just leave your email address in the box on the right side of the home page where it says "subscribe to this blog".  Then you will be the first to get an update in your inbox on any new posts.  The box may not be visible on mobile screens, but will be visible on the web version of this blog.  

Feel free to share before and after photos of your work with me. I'd love to do a follow up blog post so we can inspire one another... Share this blog with friends you think might enjoy it, or take this challenge on with your group of painting friends.  
Happy painting! =)

Rebecca Zdybel
Artist/Art Instructor
Myrtle Beach, SC
Share Love, Spread Light, DO ART! 


Tuesday, February 10, 2015

Tips for Traveling Abroad- Passports

ONLY 234 Days till my 
Eat, Paint, Cook Tour of Tuscany!  

 It's time to begin the fun of anticipating our upcoming adventure.  In today's blog I have some important tips that might surprise even seasoned travelers regarding passports, credit cards and how to keep track of paperwork and documents while traveling.  All of these will help you get ready to GO.  There is still time to sign up by following this link:
SIGN UP HERE- Eat Paint Cook Tour of Tuscany Oct 3-10, 2015 with Rebecca Zdybel

Anticipation of a big trip is part fun and part challenge.  While I look forward to going, there is a lot to think about in order to get ready.  I have a checklist which ideally begins about 7 months prior my trip.

First on the list:  Check my Passport!
Mine is due to expire in about 9 months.  Even though it will expire after I return, I need to renew now.


  • News Flash!  If your passport expires 6 months from your date of entry, you may be prevented from traveling abroad!  In fact, most countries require that a passport be valid for at least 6 months beyond the completion of a trip. Check your passport early and renew well in advance to avoid trouble getting on the plane.


  • Renewing a passport is no big deal...It will give you the chance to take a good photo instead of settling for that old one taken 10 years ago on a day you forgot to wear lipstick. ;-)


    Renew Your passport by Mail if All of the Following are True


    Your Most Recent U.S. Passport:

    • Is undamaged and can be submitted with your application;
    • Was issued when you were age 16 or older;
    • Was issued within the last 15 years; and
    • Was issued in your current name or you can legally document your name change with original or certified copy of your marriage certificate or the government-issued document evidencing your legal name change.

    Be aware that there are lots of "agencies" online to help you get passports and give assistance.  They often charge for the privilege of their help, so I make sure to only deal with US government run sites.  That way you avoid paying the middleman.  


    For more passport info you can visit:  http://travel.state.gov/content/passports/english/passports/renew.html


    Keeping track of your passport, travel documents and cards is also important while traveling. Here are some tips that have helped me stay together and organized.  
    Bubble Boys- Tuscany
    11 X 15 Watercolor- Castellina, Italy  by Rebecca Zdybel
    • Make a photocopy of your cards, passport and ID before you leave and put them in your carry-on.  When you arrive at the hotel, put them in the safe so you have access to information in the event of theft.  
    • Contact  credit card companies before you leave to tell them the dates and places you'll be traveling abroad.  It avoids fraud protection issues that can impact your ability to use the cards while traveling.  (God forbid we can't spend money!)
    • Check to see if your card charges foreign transaction fees.  Ask your credit card representative.  If you will be charged fees,  think about getting a card that doesn't charge foreign transaction fees.  Barclay and also Bank of America both offer them. 
    • Bring medical insurance cards and your healthcare savings credit card if you have one.  
    • Always keep your passport in your hand...do not set it down or let it go out of your sight with employees of any restaurant or rental companies.  Hotels sometimes keep your passport on tours, and though this really bothers me, I will cooperate if they insist. .  
    • Consider money belts or bra-wallets to increase the safety of your cash, cards and identification. 
    • Keep your paperwork together and secure:  I generally make a manila envelope as my travel file.  I keep my boarding pass there, and I put copies of my itinerary there and any travel emails sent to me by my carriers or travel companions.  That way I have one place to look when I want to refer to travel arrangements.  I keep this with me while I travel in my carry-on.  I also make a copy for my husband to keep at home if he's not traveling with me. 
    "A Whole Lot Going On Upstairs" Watercolor Diptych of Siena, Italy Rooftops

    If you'd like to have my help in making a trip to Tuscany EASY, deliciously fun, and relaxing with opportunities to dabble in painting and Cooking then Sign up Today!
    SIGN UP HERE- Eat Paint Cook Tour of Tuscany Oct 3-10, 2015 with Rebecca Zdybel

    View the complete description of the tour in the brochure below.
    Eat, Paint, Cook Tour of Tuscany 2015- with link .pdf


    SIGN UP HERE- Eat Paint Cook Tour of Tuscany Oct 3-10, 2015 with Rebecca Zdybel

    "San Fedele Awaits"- Watercolor by Rebecca Zdybel
    Our Home away from Home in Tuscany 


    Watercolor and Ink on Paper Rebecca Zdybel 
    If you have travel tips to share, please leave your comments below.  I love hearing your ideas!

    Rebecca Zdybel
    Artist, Instructor, Art-Travel Instructor
    Art Lessons in all media
    Myrtle Beach, SC
    rebecca@artmyrtlebeach.com

    Spread Light, Share Love, DO Art!


    Check out my Spring 2015 Newsletter page.  Look for it on the home page of my website for all the latest happenings and upcoming workshops!

    Feel free to share any of this blog post on your own blog or website, but I ask that you you include:
    Rebecca Zdybel is an artist and instructor in Myrtle Beach, SC.  Follow her and see her work at http://www.artmyrtlebeach.com/


    "Like" my facebook page: Rebecca Zdybel- Artist


    Join me on Google+ Rebecca Zdybel Google+ Profile
     
    Copyright 2012 Rebecca Zdybel.  All Rights Reserved.
    Designed and Maintained by Myrtle Beach Website Designer