Showing posts with label Rebecca Zdybel Artist Art Instructor. Show all posts

Saturday, May 30, 2015

30 Day Drawing Challenge Day 29- Draw Flowers

30 Day Drawing Challenge Day 29- Draw flowers


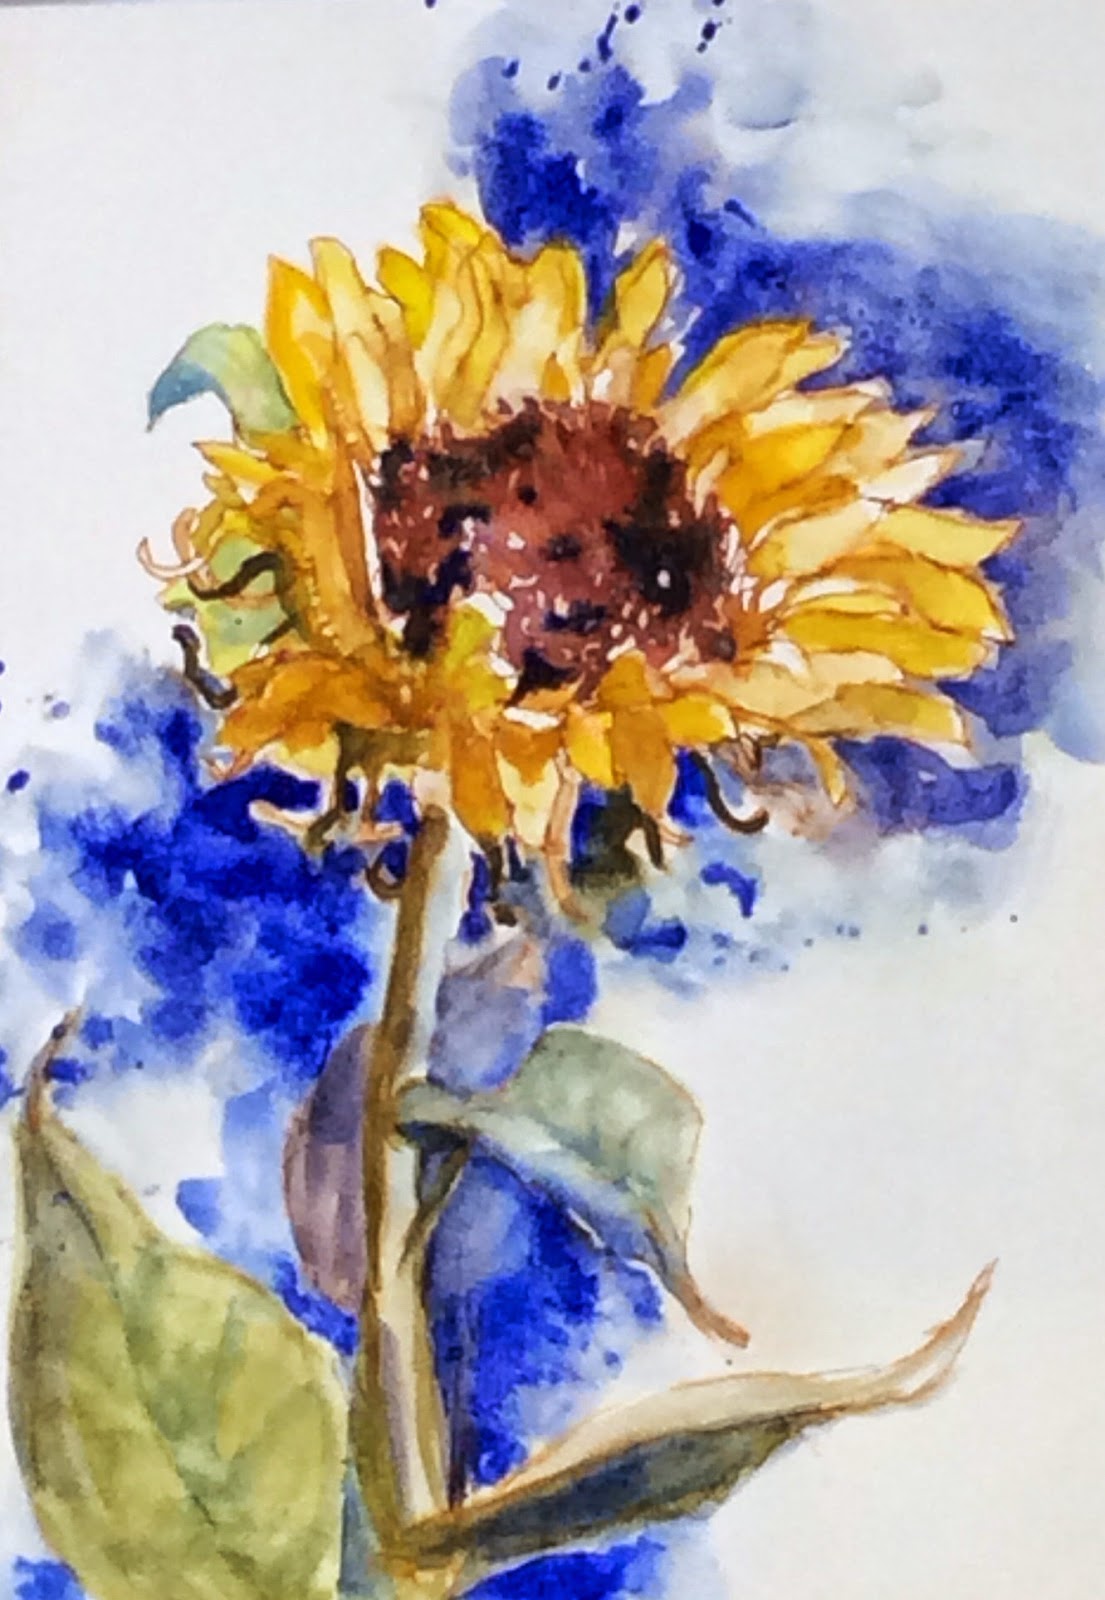
Elegant Writer and Watercolor 
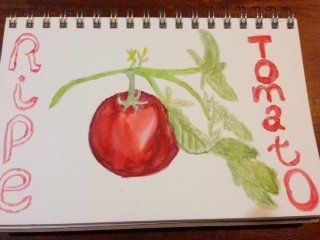
Tombow 947 and Watercolor
Congratulations! Tomorrow you will be able to say you committed and completed 30 Days of Drawing!  I was discussing the joy and the zen of drawing yesterday.  I paint, and of course I love painting.  I also love to draw and sketch, and surprisingly I sketch for a little different reason.  When I draw, I am very present wherever I am.  I am seeing intently and noticing my surroundings.  When I paint, I tend to be transported and the process is more "otherworldly".  I'm not sure if anyone else can relate to that, but there it is. If you have thoughts on this I'd love you to comment and hear your opinions.

That's why I love to draw and paint on location.  Art journaling is incredibly fun and almost my preferred way to make art when I travel...it forges an incredible bond with wherever I am.  I hope you'll pardon me taking a moment to encourage you to join me for my EAT, PAINT, COOK Tour of Tuscany Oct. 3-10, 2015.  It is art travel at it's finest.  It's incredible...and I'm not just saying that!  Drawing, Painting, Eating chef prepared meals, seeing gorgeous Tuscan hill towns and vineyards, sampling local wines, cooking lessons, drivers to all our destinations, and music in the evenings...ahhh, I can't wait to get back there and would love to have you join me!  See the brochure on my home page in desktop view, or follow this link:  Eat Paint Cook Tour of Tuscany 10-3 to 10-10-2015
Misty Morning in Tuscany ©Rebecca Zdybel
The view from one of our little hill towns is panoramic
and lends itself to paintings like this little watercolor sketch.
Join me and I'll take you there and show you how...

During our 30 Day Challenge, you've processed a truckload of information, so I'm going to keep it simple today and let you get right to it.  Let's celebrate spring and the glorious beauty of flowers!  

Today's Drawing challenge: 

  • Take some real flowers, or real artificial flowers and draw from life, OR find a photo reference and use that for your drawing.  You may use any materials you'd like
  • When finished you can send me a photo!
Here are a few sketches from fellow artists and past days of the Challenge:


So much fun to see what you do with these challenges!

Special Notice: 
My website will be changing to become more mobile friendly and add some new features.  If you are a subscriber, you will need to update your subscription.  A new notification will soon arrive in your inbox and ask for you to confirm your subscription.  It will be from my website server.  Just click that confirmation and you will continue to receive updates to this blog directly to your email inbox.  There is a button on my home page that allows you to subscribe, but if you'd like to subscribe and have not been able to do so, please email me and I will send you that link.   My email address is rebecca@artmyrtlebeach.com.  I have lots of new ideas and lessons I plan to share over the next few months.  I also will be traveling extensively during September and October and will be blogging about my adventures and my art along the way.  If you subscribe today you'll be kept up to date and share the all the fun!  I hope you do... <3

Rebecca Zdybel
Artist, Instructor, Art-Travel Instructor
Art Lessons: Drawing, Watercolor, Acrylic, Collage, Mixed Media
Myrtle Beach, SC
rebecca@artmyrtlebeach.com

Spread Light, Share Love, DO Art!

Feel free to share any of this blog post on your own blog or website, but I ask that you give attribution and include:
Rebecca Zdybel is an artist and instructor in Myrtle Beach, SC.  Follow her and see her work at http://www.artmyrtlebeach.com/


Join me on Google+ Rebecca Zdybel Google+ 


Friday, May 29, 2015

30 Day Drawing Challenge Day 28- Draw from a Google Image

30 Day Drawing Challenge Day 28- Draw from a Google Image


Vegetable or Fruit? Tomato or Tohmahtoh? I never knew how beautiful artichokes can be.  While researching artichokes, I discovered the artichoke flower, and I had to include it in my sketch of French artichokes.  How did I discover the artichoke flower? Answer- Google Images.  If you've never tried looking on this site for reference images, then you NEED to go there.  

  
Examples of photos I found on Google Images


How to use Google Images: 

  • There's two ways to get to Google Images...When I go to Google on my desktop, up in the top right corner of the screen the word "IMAGES" is next to my name.  If you click on that word, it will take you directly to the Google IMAGES site.   
  • You can also go to the Google website and you search the word "images" Google IMAGES will come up as the first option.  Click on it and a world, no a UNIVERSE! of images will be at your fingertips.  I go there very frequently when I have a project in mind to obtain reference photos or begin to wrap my mind around a subject and various ways to treat it.  That's what I'm going to have you do today.


 I always try to Draw from LIFE or 
Draw from PHOTO references.

When doing realistic artwork, it's my assertion that you should always be looking at a reference of some sort.  Every time I draw from inside my head without looking, things quickly go wrong.  Objects simply don't appear as I imagine they do.  Does this surprise you?  If you have trouble drawing, try LOOKING more carefully at your subject.  I bet you'll see improvement in your work. (Make sure you put your glasses on, haha!) 


The other day I had you draw a Teacup from life.  This can be a challenge.  You have to sit still.  Often, it's helpful to close an eye (to keep the slight perspective difference between your eyes at a minimum). Composing your subject can be difficult.  You have to answer a host of questions just to get started: where to put it on the page? how large shall you make it?  Will it go off the page and where?  Will you draw the entire object? From what perspective will you draw it?  Whew!  No wonder it's hard to know where to begin sometimes!

Photos are great, and to avoid any controversy, the best ones to use are your own. This avoids lots of issues. But let's face it, we don't always have photos of what we need.  That's when Google Images is a goldmine, but CAUTION!  How to avoid getting in trouble for copying someone else's work: 

Drawing from a photo reference immediately answers some of the problems that need to be addressed when starting a project.  With that photo, your perspective is already decided upon, and your image has already been composed and sized within the frame.  This is why photo references can be so helpful.  This is also why images are considered intellectual property.  The photo artist has composed, cropped, and captured a unique perspective on the subject.  If you use someone's photo as a reference, you must keep in mind that you are copying someone else's work.  However, it's not black and white.  The lines are gray, and I try to use a common sense approach.  If I use someone else's photo, I try to make it so that the photographer will not recognize their work in mine.  I personally do not think it is wrong to be inspired by other artists.  I do think it's wrong to copy, unless you are in a class or beginning as a painter. However, if you are going to enter shows or sell your work, many art organizations who host juried shows will reject you and possibly embarrass you if they withdraw an award due to copying.  Be very careful how you use other people's images!  The general rule for me is this:  If it's someone else's image, I don't enter it in shows.  If I've copied someone else's painting, then I also don't enter it in shows and I personally feel it also should not be sold.  Do you see the lines getting grayer here?  If you are working with a teacher and you copy their painting, I would suggest you check with your teacher and get permission prior to entering or selling.  This will help you avoid any future awkward moments.
Impermanence by Sheryl Luxenburg.  The stock photos she used to derive her painting are below. 
These stock photos were combined for a painting which won the AWS gold medal in 2008. If you're curious, here's an article that tells what can happen even if you buy the license to use an image.  Sheryl Luxenburg had her award withdrawn and is now banned from participation due to violation of the AWS show's stipulation that work must be original:  Innocent mistake led to controversy: disgraced artist and Statement by AWS regarding controversy over Impermanence-2008 Gold medal withdrawal.  We all need to make sure to avoid that kind of situation.

OK, I've gotten a bit wordy today, but some days I just have a lot to tell you =). 
Here's your Challenge for Day 28 of our 30 Day Challenge:  


  • Go to Google Images and research a vegetable or fruit and find a reference or a few references.  If you want to draw artichokes, it's allowed, despite the fact that it's really a flower! ;-)
  • Print out your favorites and then use them to create a drawing.  You may use your weapon of choice, so long as it doesn't hurt anyone. lol
  • You may draw, color, or whatever your little heart desires for this sketch. You've earned it after 28 days of dedication!
  • Take a photo of your sketch and send it my way.  I'm enjoying the exchanges I'm having with those of you who are sharing with me. Here'a a few of their sketches from Day 27 Draw a Chair:
 

Special Notice: 
My website will be changing to become more mobile friendly and add some new features.  If you are a subscriber, you will need to update your subscription.  A new notification will soon arrive in your inbox and ask for you to confirm your subscription.  It will be from my website server.  Just click that confirmation and you will continue to receive updates to this blog directly to your email inbox.  There is a button on my home page that allows you to subscribe, but if you'd like to subscribe and have not been able to do so, please email me and I will send you that link.   My email address is rebecca@artmyrtlebeach.com.  I have lots of new ideas and lessons I plan to share over the next few months.  I also will be traveling extensively during September and October and will be blogging about my adventures and my art along the way.  If you subscribe today you'll be kept up to date and share the all the fun!  I hope you do... <3

Rebecca Zdybel
Artist, Instructor, Art-Travel Instructor
Art Lessons: Drawing, Watercolor, Acrylic, Collage, Mixed Media
Myrtle Beach, SC
rebecca@artmyrtlebeach.com

Spread Light, Share Love, DO Art!

Feel free to share any of this blog post on your own blog or website, but I ask that you you include:
Rebecca Zdybel is an artist and instructor in Myrtle Beach, SC.  Follow her and see her work at http://www.artmyrtlebeach.com/


Join me on Google+ Rebecca Zdybel Google+ 


Thursday, May 28, 2015

30 Day Drawing Challenge Day 27- Draw a Chair

30 Day Drawing Challenge Day 27- Draw a Chair
©Rebecca Zdybel


Today's subject is just sitting around waiting for us to draw. Get it?  I hope I hear you smiling.  ;-)


What makes a chair challenging is that it may require you to really look carefully, because they don't look like you might think they look.  Why?  Because they are adhering to laws of PERSPECTIVE.  We all know those legs are all the same length, but they NEVER look that way.  Would you ever think a chair could stand on 2 legs?  Would you ever draw it that way? Would you ever even imagine it that way?  But look at the photo on the left...

You see...it's all a matter of perspective! Think of the chair as as a 3D Cube of sorts.  As such, the bottom of parallel chair legs will generally recede to a disappearing point on the horizon (or at the same height as the viewer's eyeline).  Similarly, the edges of square seats, and chair arms may also recede according to lines of perspective. In fact, drawing a cube around the seat of a chair as a guide of sorts can be a good idea.

Food for thought-  If an object is below the horizon line, all horizontal lines of perspective will recede UP to the horizon.  If the chair is viewed from below (with a low horizon), all horizontal lines of perspective would appear as if they are receding DOWN to the horizon.  It may sound confusing if you haven't practiced drawing your cubes, but for those of you who have, I hope this will be a helpful bit of information.  For more complete instructions on this concept follow this link: 30 Day Drawing Challenge Day 18- How to Draw a Cube


The chairs above have 3 ½ legs and 3 legs...hmmm.  Who'da thunk?

Ahhh, finally a chair with 4 legs, but look!  None of them are the same length!
Another Hint:  Sometimes drawing a chair by drawing the negative spaces can make everything fit together a bit easier.  This is a tried and true technique from Drawing on the Right Side of the Brain by Betty Edwards.  You may want to try it with these chair photos, or you may draw your own if you prefer.  If you wish to draw the negative spaces, taking a photograph is the easiest way to frame your shot and flatten the image.  Send it to your printer and you're ready to draw!  For more instructions on this way to draw follow this link:   30 Day Drawing Challenge day 6- Complex Negative Image and 30 Day Drawing Challenge Day 5- Think positively about drawing Negatively


Good luck drawing your chairs!  Only 3 more days till you cross the finish line and can pat yourself on the back and say you completed 30 Days of Drawing! I'll be back tomorrow with yet another free lesson, and I hope you'll meet me here.

Special Notice: 
My website will be changing to become more mobile friendly and add some new features.  If you are a subscriber, you will need to update your subscription when it changes.  A new notification will soon arrive in your inbox and ask for you to confirm your subscription.  It will be from my website.  Just click that confirmation and you will continue to receive updates to this blog directly to your email inbox.  There is a button on my home page that allows you to subscribe, but if you'd like to subscribe and have not been able to do so, please email me and I will send you that link.   My email address is rebecca@artmyrtlebeach.com.  I have lots of new ideas and lessons I plan to share over the next few months.  I also will be traveling extensively during September and October and will be blogging about my adventures and artwork along the way.  If you subscribe today you'll be kept up to date and share the all the fun!  I hope you do... <3


Rebecca Zdybel
Artist, Instructor, Art-Travel Instructor
Art Lessons: Drawing, Watercolor, Acrylic, Collage, Mixed Media
Myrtle Beach, SC
rebecca@artmyrtlebeach.com

Spread Light, Share Love, DO Art!

Feel free to share any of this blog post on your own blog or website, but I ask that you you include:
Rebecca Zdybel is an artist and instructor in Myrtle Beach, SC.  Follow her and see her work at http://www.artmyrtlebeach.com/


Join me on Google+ Rebecca Zdybel Google+ 

Monday, May 25, 2015

30 Day Drawing Challenge Day 24- Tombow Marker Sketch

30 Day Drawing Challenge Day 24- Tombow Marker Sketch
©Rebecca Zdybel 


Today I'm breaking out my Tombow Markers and doing a sketch, and I'm encouraging you to give it a try as well.  If you have another water-soluble marker, then you can substitute it for this one, but my favorite is this Burnt Sienna color  #947.
 If you would like to get one, it's around $5-6. Here is a link to order it:  Tombow 947 Marker- Amazon

One of the things I love about this marker is it's ability to almost disappear once you bring water to the paper.  However, as with most ink applications, don't be too heavy with your lines at first.  Also, this is important...if you plan to use water on your sketch, make sure that your paper is watercolor paper or mixed media paper. 

Here are a few examples of sketches I've done with this marker.  All have been drawn in my favorite sketchbook, my Aquabee Super Deluxe sketchbook.  The paper holds up well for most media, and allows me to bring water to the page without it breaking down.  

I'm not going to tell you what to draw today...keeping it short  and hoping you feel inspired to continue sketching on this 24th Day of our 30 Day challenge.  The subject matter is open, but try using your Tombow pen or a water-soluble marker if you have one.  Otherwise, you could substitute your water-soluble crayons or watercolor pencils if desired.  


Tombow 947 marker, permanent marker and white gouache
©Rebecca Zdybel 

Note: These markers come in all colors, and the sketch below is an example of the many color varieties available. I'm just sharing my favorite with you, but you might experiment and find another color your like better.  Experimenting is the perfect thing to do during a sketch challenge!
©Rebecca Zdybel 
This is a page from my sketchbook.
There are many zentangle patterns recorded here.
All were drawn with various colors of Tombow Markers and Staedtler Mars Black permanent inkpen. 

This challenge is a huge commitment, but you are almost done!  Keep up the good work and send me photos of your finished drawings!  Fellow challengers are drawing their hearts out and are being so dedicated!  Here are some beauties that have been sent my way:


Above: What a lovely sketch of Shadows with Color and Drawing from still life using red and blue Elegant Writer markers on Day 21 of our 30 Day Drawing Challenge. Here's the link in case you missed it: 30 day Drawing Challenge Day 21- Shadows/Color

To the right: Illustrations of Letters give a chance to practice letter making as an art form, and picture making as a means of illustration.  It's fun! If you'd like to try it, here's the link to Day 22:   30 Day Drawing Challenge Day 22- Favorite Letter Illustration

And below:  I had to include this beautiful Zentangle as a reminder of how beautiful pattern making can be.  Obviously influenced by Klimt, this student created something the great master might envy!  In case you missed that lesson, here is the link to Day 20- 30 Day Drawing Challenge- Day 20


Rebecca Zdybel
Artist, Instructor, Art-Travel Instructor
Art Lessons: Drawing, Watercolor, Acrylic, Collage, Mixed Media
Myrtle Beach, SC
rebecca@artmyrtlebeach.com

Spread Light, Share Love, DO Art!

Feel free to share any of this blog post on your own blog or website, but I ask that you you include:
Rebecca Zdybel is an artist and instructor in Myrtle Beach, SC.  Follow her and see her work at http://www.artmyrtlebeach.com/


Join me on Google+ Rebecca Zdybel Google+ 

Saturday, May 23, 2015

30 Day Drawing Challenge Day 22- Favorite Letter Illustration

30 Day Drawing Challenge Day 22- Favorite Letter Illustration

Injecting content in our drawings can be done in many ways.  Words can add meaning, but illustration has long been a means of telling a story with pictures.   I've been getting asking a lot of you over the last few days, so in order to get right to the drawing I'm going to keep today's instructions simple.

Today's challenge:  Pick your favorite letter and then illustrate it somehow.  You could Zentangle the letter like we did in yesterday's challenge, or practice a new font style, but you have creative license today.  An easy way to do it might be to pick a picture of something that begins with your favorite letter...here's mine:

Z is for Zebra ©Rebecca Zdybel
My sketch is done with permanent archival ink (micron o4 black) and watercolor
Have fun with your illustrations!  When ur done, please share the photo with me.
Keep up the great work...you're almost finished with 30 Days of Drawing!

Here are drawings from a fellow challenger's sketchbooks:


Great perspective and shadow on both of these sketches!  For more on  light and shadow and how to make a cube look 3-D you can check out Day 19 of the 30 Day Drawing Challenge.  Just follow this link: http://www.artmyrtlebeach.com/2015/05/30-day-drawing-challenge-day-19-cube.html 
Beautiful Zentangle butterfly from 30 Day Drawing Challenge Day 20 Zentangle- If you missed this lesson, here is the link: 30 Day Drawing Challenge Day 20- Zentangle 

Definitely Cool! and Cloudy with a Chance of Zentangle ;-)
It's so fun seeing what you guys are coming up with!  Thanks for taking the time to send them my way. =)

I will be using my Tombow marker in burnt sienna color -947 for a sketch or two during the final couple of weeks of this challenge.  If you would like to get one, it's around $5-6. Here is a link to order:  Tombow 947 Marker- Amazon

Rebecca Zdybel
Artist, Instructor, Art-Travel Instructor
Art Lessons: Drawing, Watercolor, Acrylic, Collage, Mixed Media
Myrtle Beach, SC
rebecca@artmyrtlebeach.com

Spread Light, Share Love, DO Art!

Feel free to share any of this blog post on your own blog or website, but I ask that you you include:
Rebecca Zdybel is an artist and instructor in Myrtle Beach, SC.  Follow her and see her work at http://www.artmyrtlebeach.com/


Join me on Google+ Rebecca Zdybel Google+ 

Sunday, May 17, 2015

30 Day Drawing Challenge Day 17- Vignette


30 Day Drawing Challenge Day 17- How to draw a Vignette Sketch
I like to sketch with watercolor sometimes, so after drawing with an elegant writer here and there over a pencil sketch, I then added color with watercolor.  To make the letters, I used an archival permanent marker- Staedtler Mars Dark brown

vi·gnette
vinˈyet
noun
  1. 1
    a brief evocative description, account, or episode.
  2. 2
    a small illustration or portrait photograph that fades into its background without a definite border.
verb
  1. 1
    portray (someone) in the style of a vignette.


Today's challenge will be to take some of what we've been learning and use it to create a vignette.  As you can tell from the definition above and my example in the photo, these images fade into the background and don't really have a definite border.  This is a style where WATER is your friend.  A drawing stump or tortillion (or your trusty finger) can also accomplish the smudgy edges that would be typical of a vignette.  Lots of subjects can be treated as vignettes, and I will leave the subject for you to choose.  


Here are some photo ideas that might inspire your drawing today:  


In this photo, everything but the forward elements of the rose are softened away.
©Rebecca Zdybel


https://s3.amazonaws.com/red_3/uploads/asset_image/image/52053af826465a7948000b48/central-subject_with-vignette.jpg

This is a more subtle vignette.  The background is much less developed and only the subject is treated fully.
Soft edges in the background are key to this type of vignette.


Hint:  What the dictionary says is true, but what they don't tell you is that the smudged edges of a vignette can become a border of sorts, almost framing the image.  Your vignette can be gradual as in my image above, but it can also be dramatic as in the photo ideas below. 

http://www.gemmiev.com/uploads/5/3/6/9/5369688/3402950_orig.jpg

Haha!  I couldn't resist including this one!  Note how the light untouched background is darkened at the corners and softly contains the light field behind the head forming a frame of sorts.


http://www.photoshop-dragon.com/Tutorials/Photography/Images/vignettes/final.jpg

So cute!  Note the background just fades away into a light area which becomes a frame or a mat for the image...


With these ideas in mind, have fun taking a subject and softening edges to create a vignette.  =)

Your photos are continuing to flow in, though I'm afraid that only the stalwart few are sticking with it.  If you missed a day, don't despair, just pick it up again wherever you'd like...If you are out there and haven't shared anything yet, don't be scared!  I'll keep everything anonymous, and your contributions will add to everyone's experience.  I look forward to seeing what you guys do with your vignettes.  

Day 15- Draw with something you haven't drawn before...Charcoal!

Day 15- Elegant Writer- This is the Blue Ink version? FYI the Elegant Writer comes in Black, Red, Brown, and Blue

I'm already looking ahead to later this week.  I will be breaking out my Tombow marker in burnt sienna color -947 for a sketch or two during the final couple of weeks of this challenge.  If you would like to get one, it's around $5-6. Here is a link:  Tombow 947 Marker- Amazon

Happy Drawing!!

Rebecca Zdybel
Artist, Instructor, Art-Travel Instructor
Art Lessons in all media
Myrtle Beach, SC
rebecca@artmyrtlebeach.com

Spread Light, Share Love, DO Art!

Feel free to share any of this blog post on your own blog or website, but I ask that you you include:
Rebecca Zdybel is an artist and instructor in Myrtle Beach, SC.  Follow her and see her work at http://www.artmyrtlebeach.com/


Join me on Google+ Rebecca Zdybel Google+ 

Saturday, May 16, 2015

30 Day Drawing Challenge Day 16- Drawing Your Drink

30 Day Drawing Challenge Day 16- Draw Your Drink

Can it be that we are on the second half of our 30 Days of drawing?  Here we go...we're on a roll now!

Drawing food or drink is an easy way to find a ready subject to draw.  Try drawing while waiting for a friend who's late for a lunch date.  When traveling, create an art journal and record the restaurants or meals you eat. I'm sure at this point in the challenge you've found that drawing is just plain fun!   So let's continue with today's challenge will be to Draw Your Drink.  I have a lot of instructions, so let's get right to it. 
Highlights are created by painting around them  Treat highlights as shapes.  Look closely...they are there and will glint brightly with big jumps of value if you're drawing glass.  For this sketch, I used the Elegant Writer Black marker and watercolor for the yellow tones. 


Materials to use for this Challenge:
Elegant writer marker
water container
brush (small/medium round is fine)
Watercolor or watercolor pencil, acrylic ink, or watersoluble crayon for color


  • Step 1: Get out something to drink...it's getting hotter and you've got to stay hydrated ;-)
  • Step 2: Note where your drink is located and mark it's location on the table (in case you move it or you get thirsty and take a sip)
  • Step 3:  If you have a camera, iPad, or a cell phone, take a photo before you get started.  This is important:  Take the photo from your viewpoint in the chair you plan to sit in.  This is because your perspective matters and will change the entire drawing if it changes.  This photo will be your back-up in case the drink moves or in case you move.  It will also be a way to "check your drawing".  (I use this technique all the time when drawing on location.)
  • Step 4: Now draw your drink. Note any highlights on the glass or shiny surface.  Draw that highlight as a shape...oval, square, rectangle, cone.
  • Step 5: Note the top of the drink container is usually round.  However, if you view something round from an angle it becomes an oval or an elipse. The top of the drink will generally be the same as the bottom, so you may be able to make two of the same ovals once your get the correct shape.  If the container isn't transparent or the shape of the container is different from top to bottom, then the top and the bottom will be different.  Remember this hint:  The bottom of glasses are not flat so don't draw a straight line!  There are no straight lines on a curved surface. 
  • Step 6: Once you draw your drink, note any shadows your drink is casting...either on the surface of the table or within if the glass is transparent.
  • Step 7: Once you finish the drawing, you can add color to it with whatever you choose.
  • Step 8:  Take a photo of your drawing and send it to me...text or email is fine.

If journaling and traveling are something you enjoy doing, or would like to do, you should join me October 3-10, 2015 for my Eat Paint Cook Tour of Tuscany!  There is still room if you hurry...


Here are a few drawings from Fellow 30 Day Challengers...


I think this is drawing a rounded form from Day 11- but nice formatting!

Day 14- Elegant writer makes these simple studies so easy!

Day 14
Nicely done again everyone!  I can't wait to see your drawings and share your favorite tools and see what you're drinking  ;-)

Rebecca Zdybel
Artist, Instructor, Art-Travel Instructor
Art Lessons in all media
Myrtle Beach, SC
rebecca@artmyrtlebeach.com

Spread Light, Share Love, DO Art!

Feel free to share any of this blog post on your own blog or website, but I ask that you you include:
Rebecca Zdybel is an artist and instructor in Myrtle Beach, SC.  Follow her and see her work at http://www.artmyrtlebeach.com/


Join me on Google+ Rebecca Zdybel Google+ 

Friday, May 15, 2015

30 Day Drawing Challenge Day 15- Favorite Drawing Tool

30 Day Drawing Challenge Day 15- Favorite Drawing Tool

For me, the sketchbooks are more like a secret and wholly spontaneous jeu d'esprit and some of them I like as much as anything I have ever done. They are invariably without premeditation. I mean not only that I have no plan when I make them, I also have no plan to make them. 
Robert Motherwell

Congratulations on reaching the half-way mark of our 30 Day Drawing Challenge!  I'm so proud of each of you that have taken the time to do drawings over the last 15 days!  Alright, I know a few of you are skipping, or doing more than one in a day, but it's all good.  Drawing is NEVER a waste of time, and you'll always be better off when you make that time for yourself.

Today I want to share a few favorite Drawing Tools with you. You may have a drawing tool you have come to love over the years.  I'm always interested in people's favorite tools...because in all honesty, I am an art junky and I love to collect materials!  I'm going to share a few of my favorites and I encourage you to share yours with us in the comments below.  It would be fun to learn from one another.

Here's a few of my favorite drawing tools: 
Elegant Writer Calligraphy Marker in Black Extra Fine Nib 
Zebra Gr8t Gel pen in Black
Staedtler Mars Graphic 3000 Black Marker
Stabilo Woody Crayon- I especially love the Black one
Caran d'ache crayons
Tombow 967 Marker
A chopstick whittled into a calligraphic nib dipped in walnut ink
Bamboo pens dipped in india ink


The list could go on, but these are all great!  If you have a drawing tool at home that you purchased but never used, now is your chance to try it out.  I got the Staedtler Mars Graphic 3000 marker out for this exercise, and enjoyed doing a contour drawing of a candlestick.  The marker lines can be softened with water for watercolor effects that lean toward a mauve/violet hue.  I liked it!  You might too!


Today's Drawing Challenge: We are going in without a plan today...no plan, but to play around and see what happens!  I often find that MAGIC happens when I ask myself,"What if?" and then set about trying to find out...
  • Step 1- Pick a drawing tool you haven't used before and try to draw with it. (e.g.  Charcoal, crayons, markers, sharpies, colored pencils...most of us have something in our possession we haven't used to draw with)
  • Step 2- Use a contour drawing technique or use any approach you'd like.  
  • Step 3- Note somewhere on your drawing what the tool is that you are using.  
  • Step 4- Send me a photo and we can all sample what some of these different tools can do!  
Keep up the good work!  I'll be back tomorrow with another challenge. If you're enjoying this challenge, share it with your friends =)

Nice gradations of value making these look oh so round!

Love the formatting!


This cool font is called "Quigley Wiggly"- isn't it great?! Send me your fonts and let's share them!

I am wondering about the story behind this little fishy...?

If you "lose ink" when adding water...just let it dry and then add some more!  I love the design and the contours of the hair and the face!

nice!

Something about this design speaks to me ;-) What are the other fonts? So nice!


Rebecca Zdybel
Artist, Instructor, Art-Travel Instructor
Art Lessons in all media
Myrtle Beach, SC
rebecca@artmyrtlebeach.com

Spread Light, Share Love, DO Art!

Feel free to share any of this blog post on your own blog or website, but I ask that you you include:
Rebecca Zdybel is an artist and instructor in Myrtle Beach, SC.  Follow her and see her work at http://www.artmyrtlebeach.com/


Join me on Google+ Rebecca Zdybel Google+ 

 
Copyright 2012 Rebecca Zdybel.  All Rights Reserved.
Designed and Maintained by Myrtle Beach Website Designer